
You are pointing your camera at the bag with its carrier model or props. Lots of things are racing through your mind. But among them, you are trying to filter out a couple of bag photography tips to take your best shot.
The technical aspects of the camera, the surroundings of the bag, or how you are pointing the camera at it? Which one should you actually treat as the top priority?
By answering these questions, this article is set to present some fantastic bag photography ideas to you. Keep reading, and eventually, you will learn how to avoid making your bags look flat online.
1. Choose the Lens Based on the Shot You Want to Take
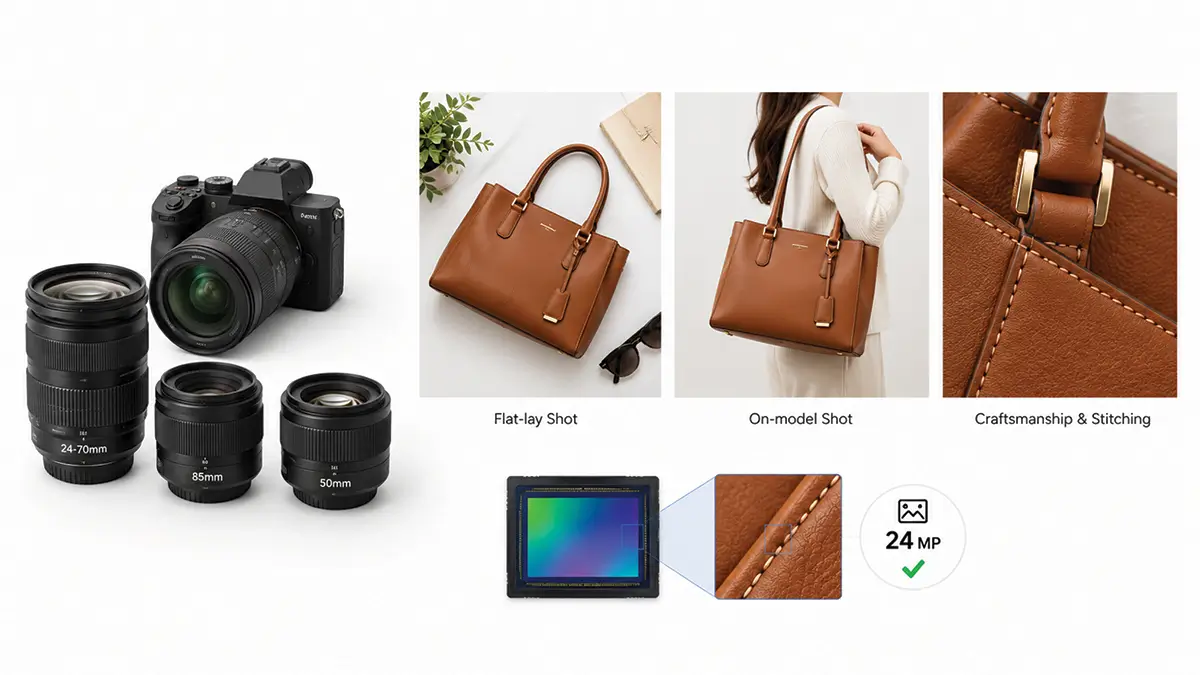
You need to get this done well before heading to the photoshoot. A zoom lens works excellently for framing both flat-lay and on-model shots of your bags. And prime lenses like the 85mm or 50mm are effective at delivering a sharp look.
Do you want to clearly show the craftsmanship and stitching of the bag? Then get a large sensor. Keep in mind that the resolution of photos for eCommerce stores should be at least 24 MP.
2. Ensure the Bag’s Shape, Scale, and Surface in the Photo
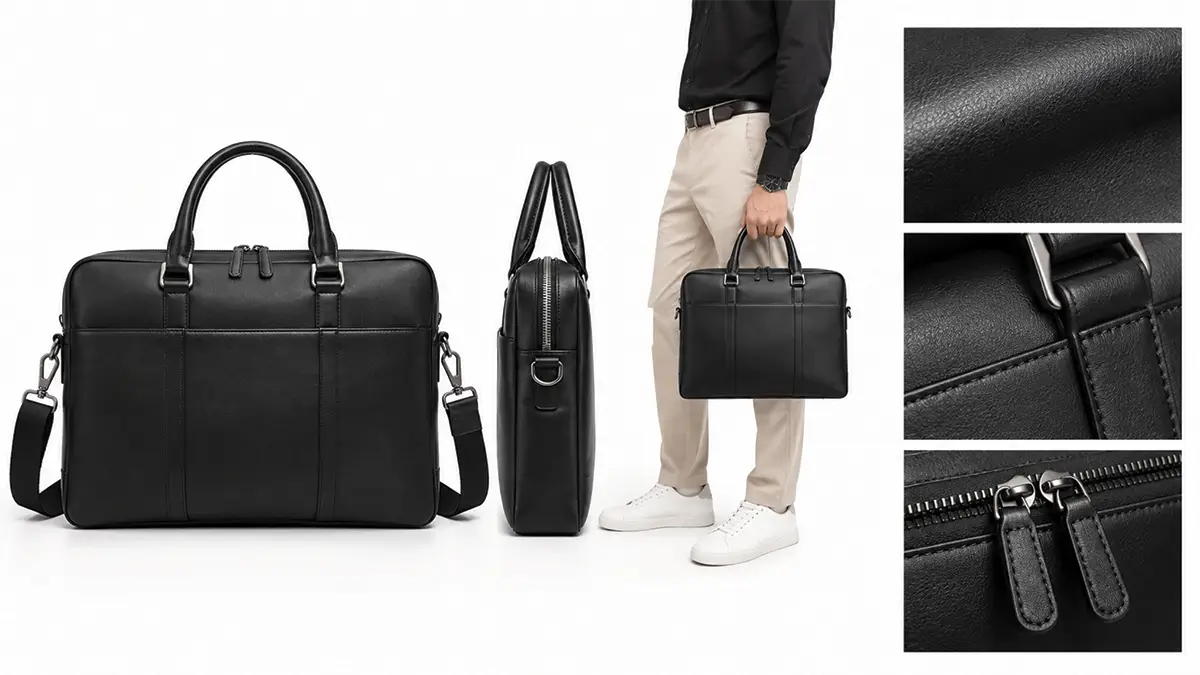
A photographer primarily needs to focus on these three aspects when photographing a bag.
- Shape: Reveals the bag’s very existence and confirms that it is a bag, not some other product.
- Scale: Provides a sense of the bag’s actual size and allows viewers to gauge how large or small it is.
- Surface: Clarifies what the bag is made of and how it is made (i.e., stitching, hardware).
The “flat look” of the bag refers to the obscuring of all these key details that every viewer wants to examine closely.
3. Take Shots in Different Angles
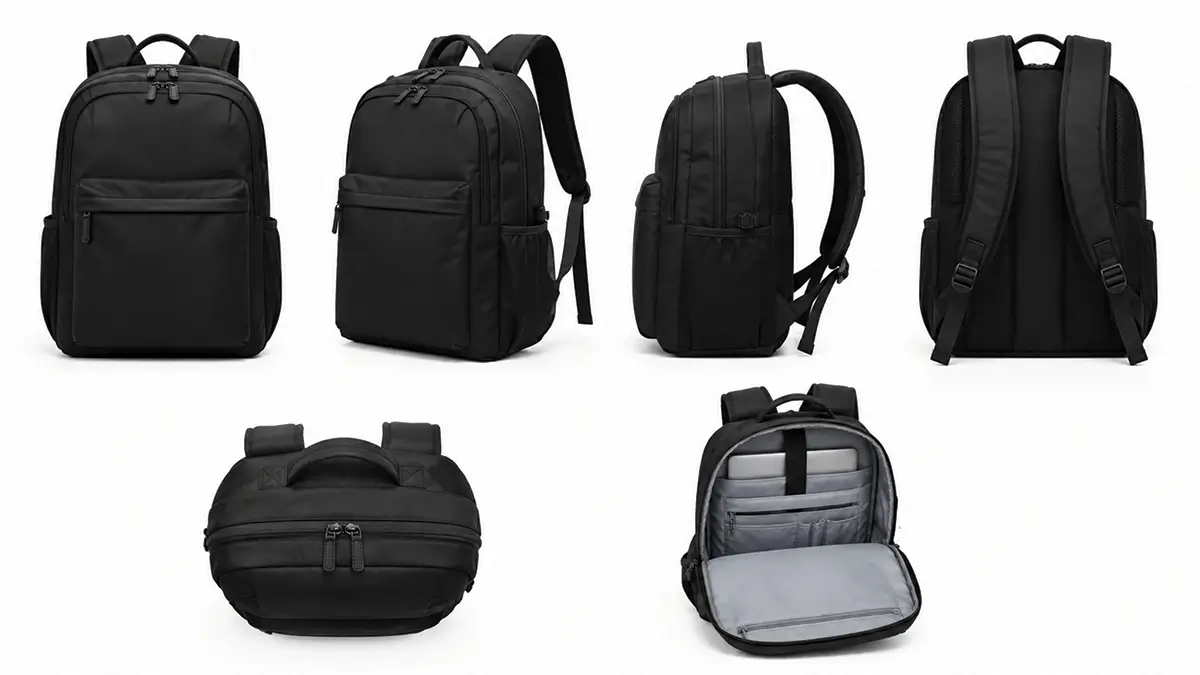
Just like with other types of product photography, multiple-angle shots are essential for bags as well. If you want to be happy with just front or profile shots, know that you are missing out on even better views.
Three-quarter and top-view or flat-lay shots can bring out the look of the bag your potential customers might be seeking.
| For backpacks or travel bags, a back shot is mandatory, as these types of bags come with several necessary features on the rear side. |
4. Show the Texture and Design Clearly
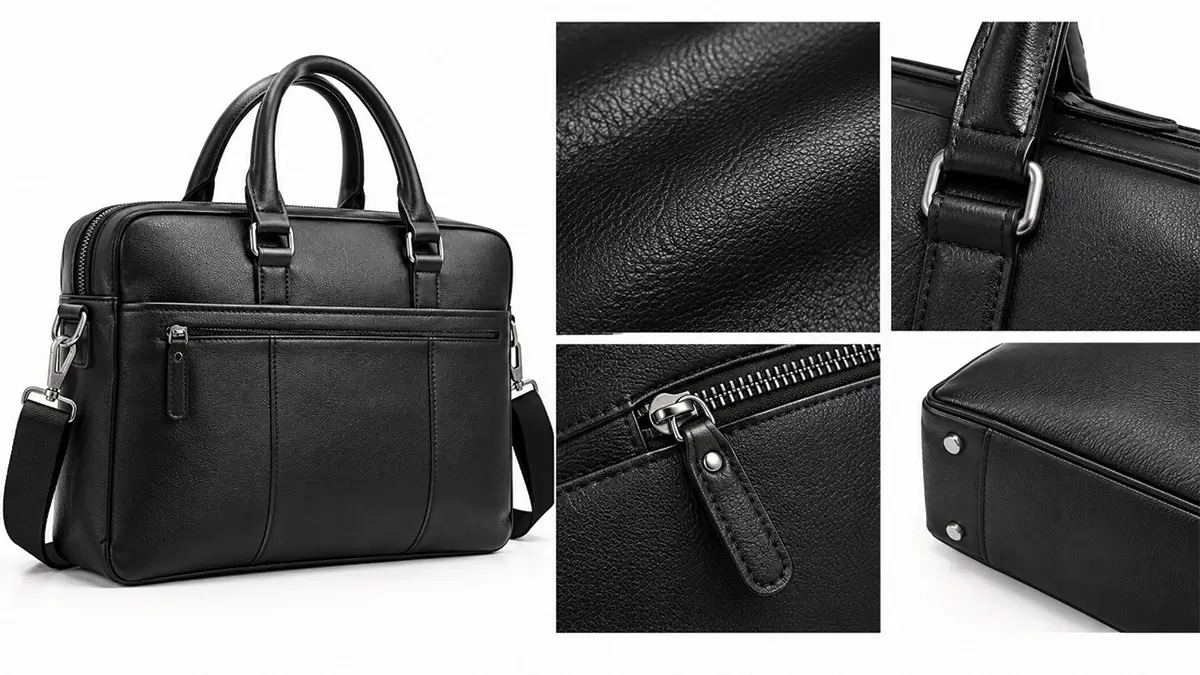
The materials the bag is made of and the design it is made in are what heavily impact customers’ choices. There is no way to overlook these details. Rather, you would want to show them even more clearly.
When the bag photo looks flat, it results in a loss of design details and the boldness of texture. So, pay attention to how much light falls on the bag and the way it falls during the photoshoot.
5. Add Props but Don’t Clutter the Surroundings
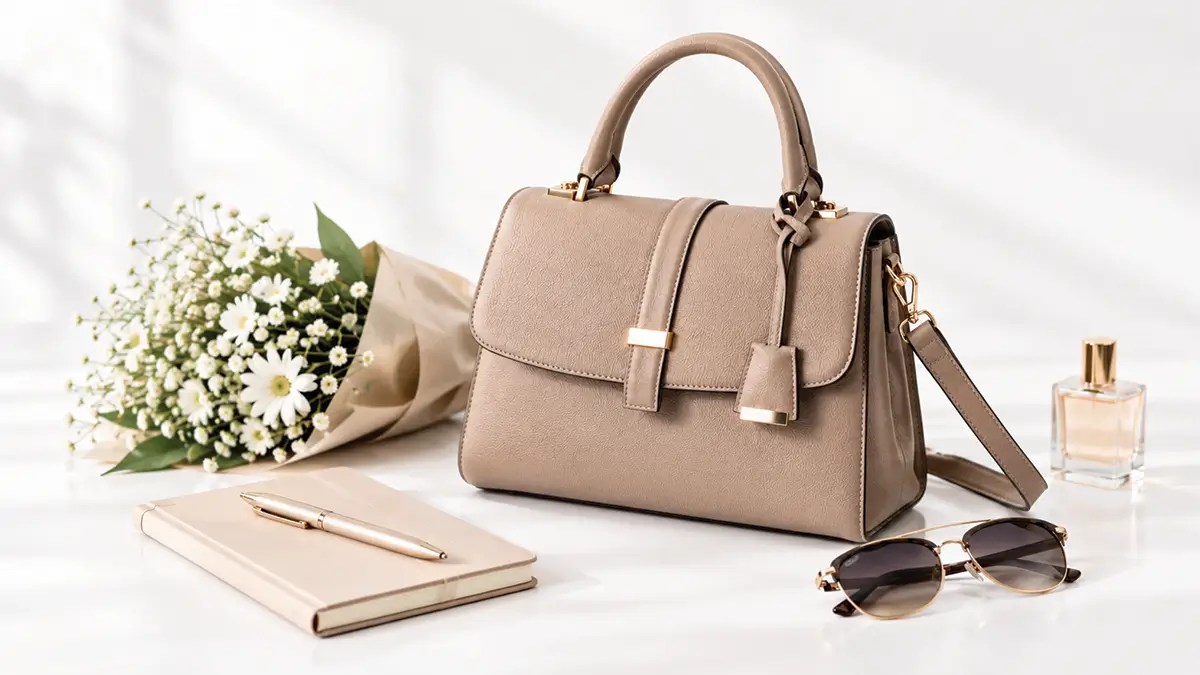
Carefully add props that match the color and style of the bag. Ensure that the viewer’s attention doesn’t shift away from the bag and onto the props. This attachment creates a story behind the photograph that the audience can connect with.
Whether it is a lifestyle, flat-lay, or model shot, here are some potential props you can use for:
- Fresh flowers
- Books or notebooks
- Tech accessories
- Groceries
- Fruits
- Sports items
- Ornaments
6. Avoid Using Direct Light or Flash on the Bag
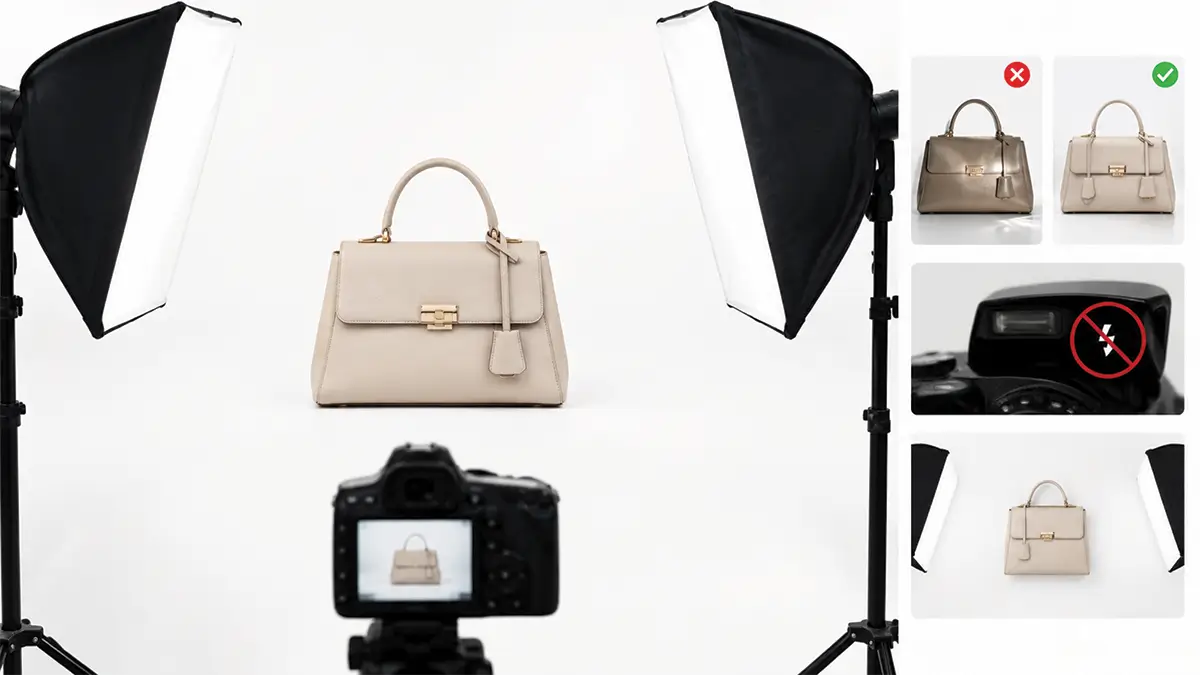
During the photoshoot, direct lighting on a bag can cause changing its true color in the photo. Moreover, such light casts harsh shadows and, sometimes even worse, an intense glare.
To get rid of this problem, professionals use lighting equipment such as softboxes or umbrellas, which are quite effective.
| When taking flat-lay shots, if the surface is shiny, there is a risk of light reflection, which causes significant hassles, especially when taking a group shot of multiple bags. |
So, prepare such a lighting setup so that soft light falls from both sides. And yes, make sure to turn off the camera flash right before pressing the shutter.
7. Bring Out the Specific Context
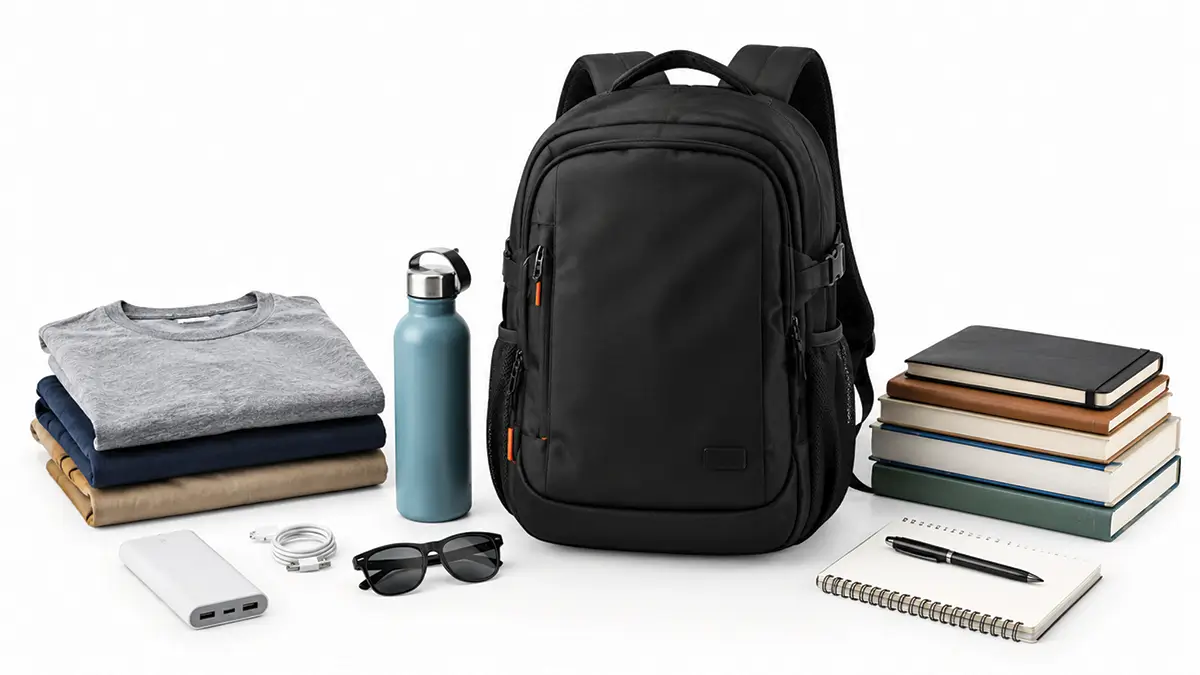
For a travel bag, you can add relevant items like a spare T-shirt, a power bank, and a water bottle. Bundles of books and notebooks can look great in a school bag photo.
More importantly, you don’t have to limit this variety solely to on-model lifestyle shots. You can use this product intent in the photos without the model as well.
The thing is- you need to convey the message about the product precisely. Then it makes your audience relate to it, and consequently, the chance for them to make a purchase decision will be greater.
Frequently Asked Questions About Bag Photography Tips
1. How can I make the details in the dark areas of the bag visible?
You can use one or two reflectors to solve this problem. This lighting tool is highly effective for bouncing light onto the dark side of the product during the photoshoot.
2. What is the way to maintain the shape of soft, thin bags?
For this, you can stuff the bag with tissues or soft fillers. This will help maintain the bag’s overall shape and allow viewers to get a clear idea of it from the photos.
3. How do you choose the right background color for bag photography?
If your bag isn’t overly flashy or multicolored, use a brightly colored background. And if the bag itself is striking in color, you should opt for a light-colored background.
4. Which parts of the bag should I take close-up shots of?
You should take close-up shots of the handles, zipper, inner pockets, and stitching. The view it produces will capture the details and depth of design of those sections.
5. Studio or natural light – which is better for lifestyle shots of bags?
Natural light indeed. Because it lends a soft and natural atmosphere to the picture. On the other hand, you should opt for studio lighting when creating a catalog for your bags.
Final Take: Do a Clean Photoshoot to Lighten the Editing Load
A photoshoot with a clean and spacious setup has its perks for each type of product photography. If you practice this with bags as well, these bag photography tips will prove effective.
And how will you sense that? Just when you move into photo post-production. You will see that more than half the work is already done during the photoshoot. What remains just needs a bit of light editing.
The thing is – it is not always possible to stick to this precaution. This leaves behind a vast amount of editing for later. And we, Retouching Zone, understand that frustrating moment, which is why we are taking this burden off your shoulders.
We have 400+ professional bag photo editing experts with more than a decade of experience, ready to deliver results on a large scale.
Do you want to give it a try? We have a free trial just for this, where you can send us a few of the photos you shot. You will shortly receive the results and be able to verify our editing quality.