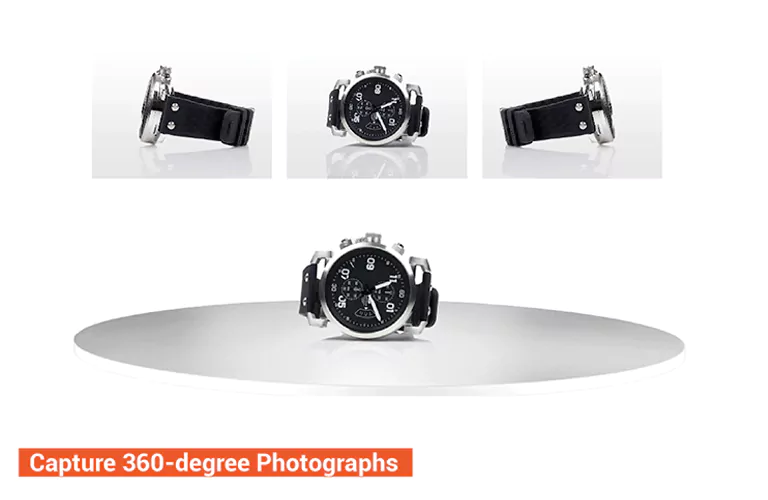
360 product photography has become a popular image-capturing technique to showcase items from all angles. Customers can better understand the item through interactive, rotating visuals. Capture One is a top-tier image tethering and post-production software to speed up your photography and image editing process.
A powerful application like Capture One can take your 360-degree product photography to a new height. This article covers how to capture 360-degree photographs while aligning the photos with the Capture One app. And use the same software to organize, batch process, and edit images perfectly. Let’s dive in!
Benefits of 360-degree Product Photography
If you are looking for a captivating technique to provide customers with a true-to-life visual experience digitally, nothing can match 360-degree photography. Audiences get a complete spherical view of the goods. This powerful image-capturing technique gives people almost a similar feeling of holding the item in their hands as in physical shops.
Unlike traditional static images, customers can explore and evaluate their features more thoroughly. They feel more confident about buying the item. This reduces the overall return rates. Plus, you can earn buyers’ trust. This enables businesses to stand out from their competitors.
Why Use Capture One for 360 Product Photography?
Capture One is one of the best software for capturing and editing 360 photographs. Let’s learn why:
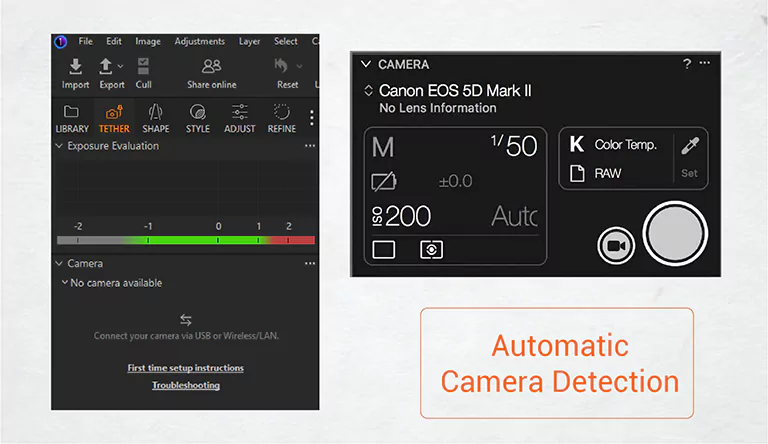
Automatic Camera Detection
Capture One can detect the camera automatically when you connect your digital or mirrorless camera to a computer via USB or Wi-Fi. The software scans active ports and uses its built-in camera driver to recognize the digital device.
Compatibility with Different Cameras
Major camera brands like Sony, Canon, Fujifilm, Nikon, etc. work well with Capture One software. Phase One, Sigma, and even Mamiya/Leaf also support this versatile application. Its powerful system can even recognize the camera’s brand and specific model.
Better Raw Demosaicing
Sometimes, your camera sensor may click incomplete color data, especially if you use any color filter array. Capture One has a powerful color reconstruction system called demosaicing or debayering. It utilizes interpolation techniques and reconstructs a complete color photo through a digital image processing algorithm.
High-speed Image Transfer
360 product photography involves dealing with hundreds of images. Capture One works very fast to transfer images onto a computer. It may take only a few seconds to get 15-20 shots on your PC. However, RAW format images may take a little more time than JPEG files. Plus, software and hardware also affect the speed rate.
Cataloging and Organizational Functionality
Capture One allows you to create catalogs to manage and organize photos. You can use collections, albums, and keywords to sort pictures by project, theme, or content. This ensures faster workflows and better categorization.
A step-by-step Guideline on 360 Product Photography using Capture One
Below are steps to follow to create 360 Product Photography using Capture One.
Step:01—Create A Plan
You can’t reach your destination without an appropriate plan. The same goes for 360 product photography. Note down these points while planning the photoshoot.
- What kind of equipment and software are needed for 360 photography?
- Is the 360-photography technique perfect for the specific item?
- How does the audience want to see the item?
- Will it align with the brand’s goals and objectives?
- How much of the budget should you allocate for 360-degree photography?
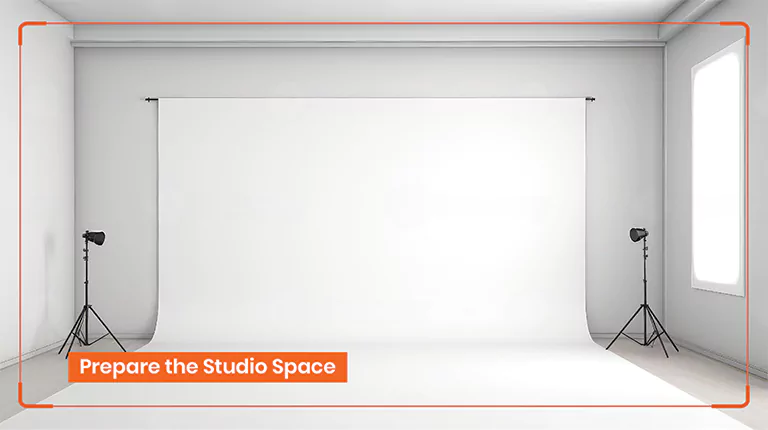
Step:02—Prepare the Studio Space
Keep the studio space free from cluttering and distracting items. Store unnecessary things in labeled shelves, drawers, or cabinets.
Create comfortable ventilation and a well-balanced temperature level. The key is maintaining a healthy and optimal working condition.
Paint over the background and surrounding walls in a neutral color. Focus on the specific areas with stains or dirt.
Step:03—Keep the Background and Floor Surface Ready
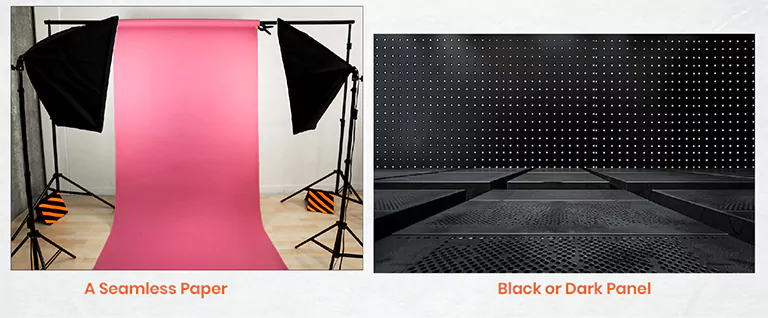
Adding a specific color background gives you more customization options. You can use different options to create a neutral backdrop, like:
- A seamless paper
- Paper rolls
- Vinyl
- Muslin
- Fabric
Make sure the studio floor surface doesn’t reflect too much light. If the ground surface is too reflective, use the following reflection control tools to reduce glare and reflections.
- Polarizing filter
- Dulling spray
- Black or dark panel
Step:04—Position the Lighting
360-spin product photography is a versatile technique that uses a wide range of lighting options. Use multiple options to have more control in photoshooting. However, it still depends on your preference. Understand your customers’ needs and use those that attract them to buy your products.
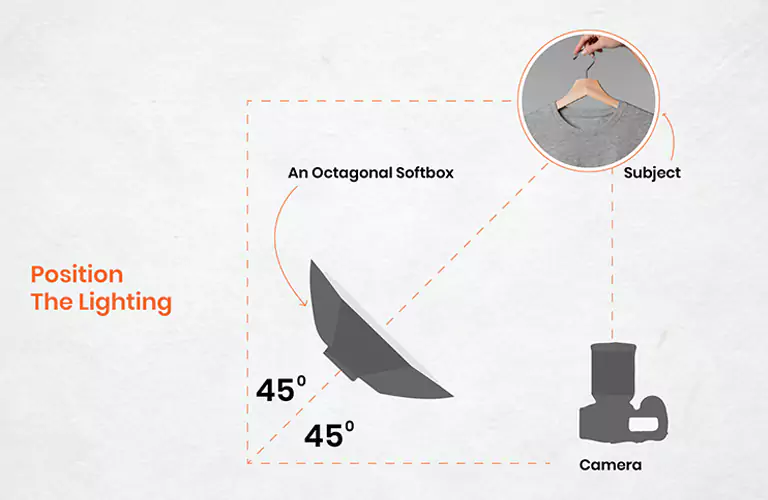
You can follow both vertical and horizontal directions to place your lighting at a 45-degree angle. The following are the most widely used lighting options for 360-degree photoshoots.
- Soft Lighting: Even and gentle illumination without any harsh shadows and highlights
- Fill Lighting: Illumination in specific areas and provide some interesting highlights
- Backlighting: Creation of depth, separation, and dramatic effects
- 360° Ring Light: Flattering the main subject with a soft glow
- Colored Lighting: Setup creative or unique moods and atmosphere
- Natural Lighting: Adding a natural look and feel to the image
Step:05—Prepare the Product
Preparing the item is highly important to showcase it in the best possible light. Keep it free from dust and smudges. Don’t let minor imperfections portray ruin the presentation.
Take enough time to prepare the item. For hard stains, wash the item appropriately. Does your garment have any wrinkles? Make it wrinkle-free using a steamer or an iron. Is there any lint, hair, or other debris on the garment? Use a Lint roller to remove them. Do your jewelry, glass, or metal items have scratches or marks? Polish them properly to make them spotless.
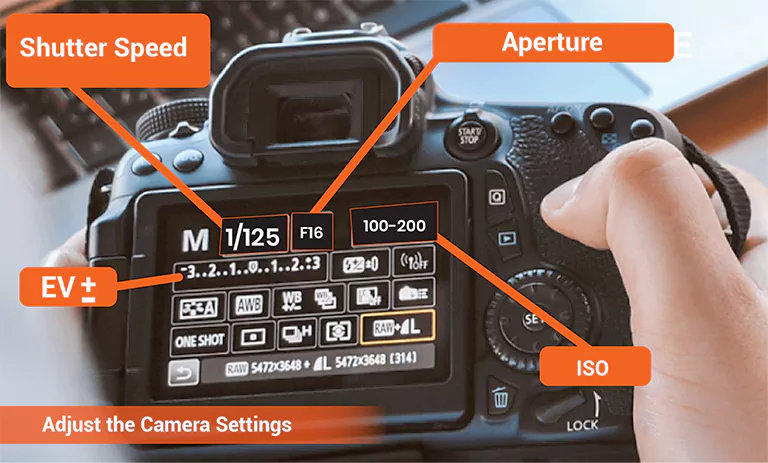
Step:06—Adjust the Camera Settings
When it comes to taking product images with a genuine essence, camera settings play a key role. Another important thing is using a functional tripod to prevent the camera from shaking and ending up having blurred images.
You can use different camera settings depending on the item type, lighting condition, camera capabilities, and what you want to highlight. However, the following are the standard settings for clothing or other items photography.
- ISO: 100-200 (Minimal noise and grain)
- Aperture: f/8- f/16 (Sharp focus)
- Shutter Speed: 1/125 (A balance between sharpness and light)
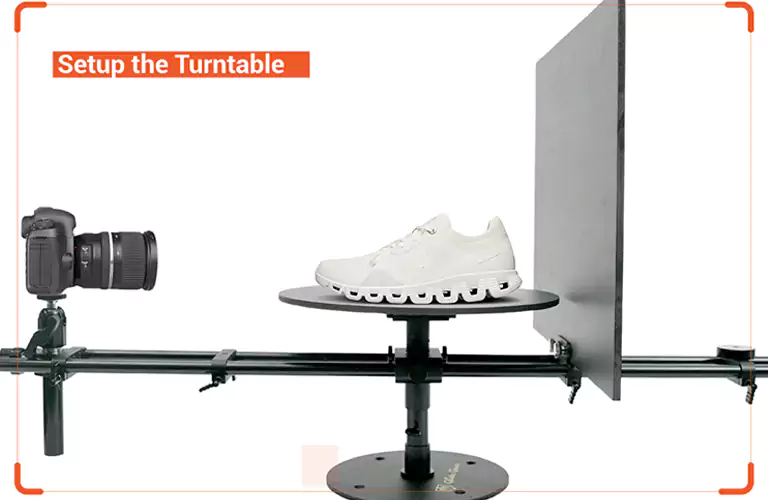
Step:07—Setup the Turntable
Use a motorized or automatic turntable that rotates smoothly. Plus, the turntable dimension must align with your item size and weight. Place the turntable at the center of the studio. Make sure the turntable’s height and the camera’s height align with each other.
You can even control the speed for most of them. Set up the rotation speed depending on how many angles you want to utilize. For instance, you can take 36 shots at 10 degrees for 360-degree product photography.
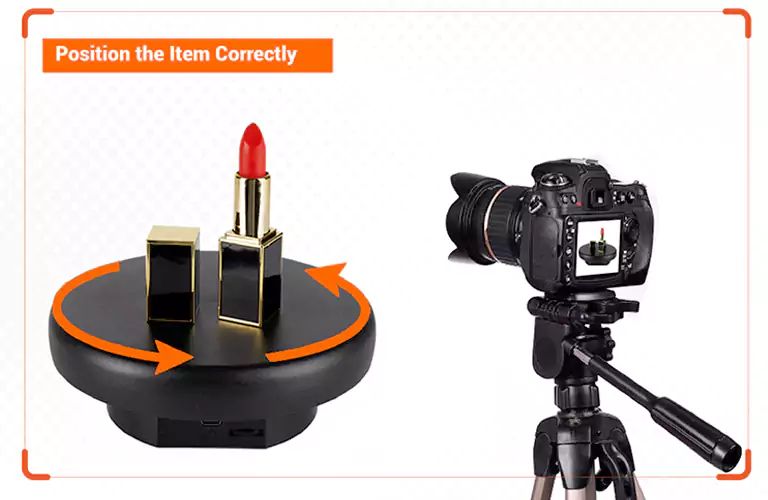
Step:08—Position the Item Correctly
Maintain the same distance and height while taking 360-degree photos from different angles. Place the item at the center of the turntable. The item will stay in place while the device rotates slowly like a circle.
The product should not be too small or too bulk compared to the turntable size. It will prevent unwanted fall-off. You won’t have to worry about any drifting issues, too. It creates a neat and professional look.
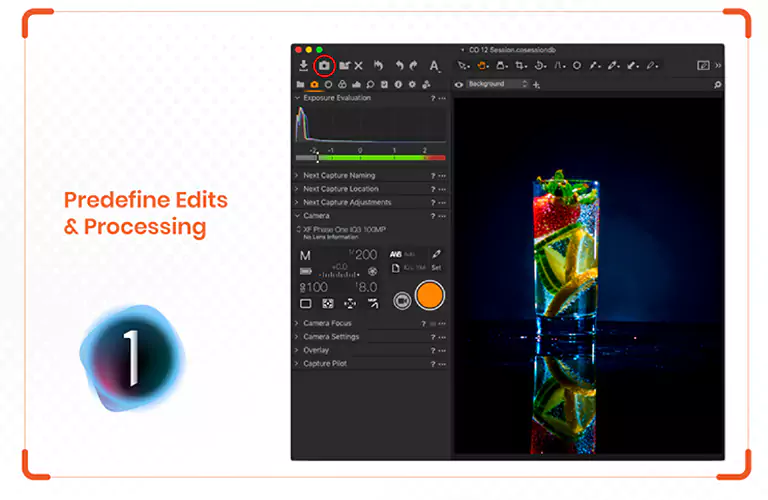
Step:09—Predefine Edits and Processing
Before finally going for a 360-degree photoshoot, testing an image can help you determine how good the outcomes will be. Connect your camera to the computer via USB or Wi-Fi. Launch Capture One software on your computer.
Navigate to the Camera Tool section and select the “Live View” option. You can also choose Window > Live View from the menu bar. A wrong focal length or incorrect framing may fail to fill the entire photo frame. You can use a predefined crop to apply the same crop automatically to all shots.
Step:10—Capture 360-degree Photographs
Once you think the camera setup is perfect for 360-degree product photography, click images at 10-15 degrees each. You will need 24 to 36 images to create a seamless rotating shot. A separate remote shutter release device comes in handy to eliminate unwanted camera shake. But you can control it using the Capture One software, too.
Observe the shots for each frame. Their exposure, focus, and composition must be well-balanced. Don’t overlook the lighting, sharpness, and positioning too. Maintaining consistency across all images is the key. Adjust the exposure and metering modes, ISO, exposure compensation, white balance, and other functions from the Capture One software.
How to Edit 360 Product Images with Capture One
Once you are done with the photography, use the Capture One software to edit them. Let’s learn about them.
Step:01—Import and Organize Photos
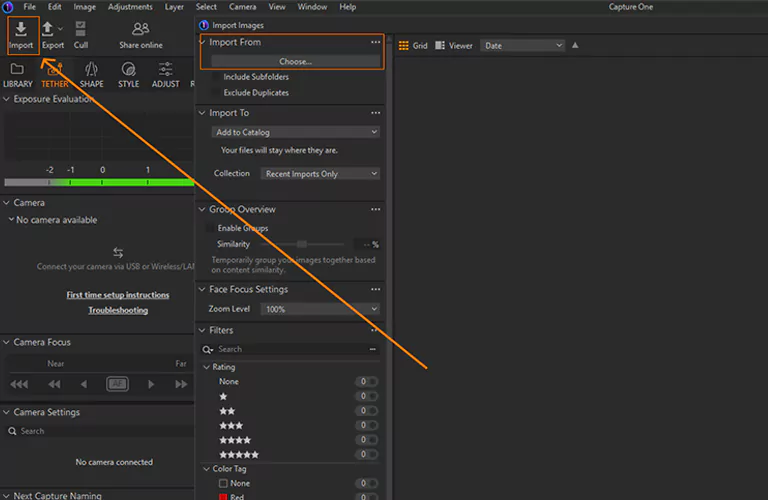
After completing the photo session, use the Capture One software to edit them further. Navigate to the toolbar area and select Library. Then, click on the + (plus) button from the upper section of the User Collections tab.
Tap on the Group from the drop-down list. Enter a name so that you can find it easily in the future. Add all images into the group for 360-degree product photography. Rename them with a number sequentially for easier collaboration. You can even add multiple projects or albums in the same group.
Step:02—Erase Imperfections
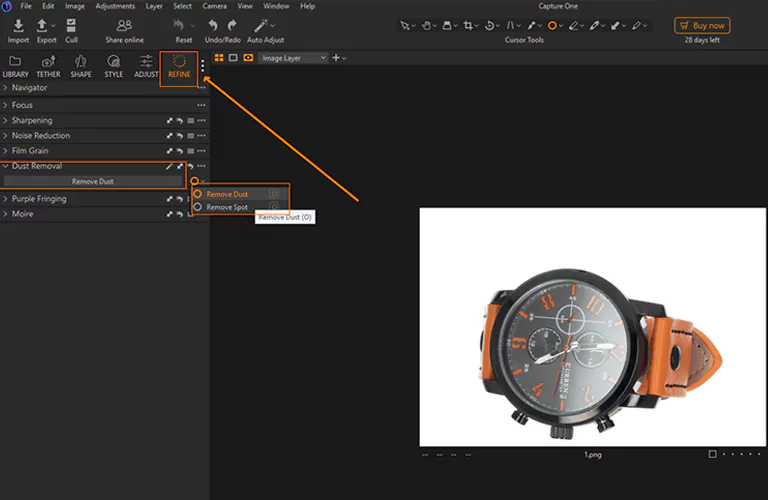
Are there any spots or blemishes on your product images? You can remove such flaws using the Spot Removal Tool. Navigate to the Refine Tool Tab and tap on the Spot or Dust Removal tool from the main tool section.
A new box will pop up. Count how many spots or dust points are in the photo. Adjust the “Spot” option accordingly. Select the “Spot” or “Dust” option from the “Type” section. Move the Radius slider to the left or right to adjust its intensity.
Step:03—Adjust the Background
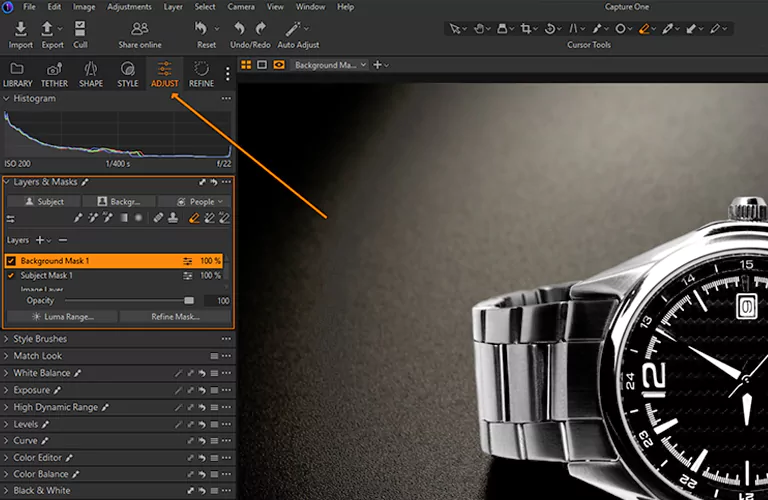
Go to the Layers & Masks tool panel and create a new layer. Mask the main subject or background to separate the item from the backdrop. After masking the background, use tools like Exposure, Levels, or Curves to adjust the backdrop.
Are there any complex elements in the background? Use the Refine Mask tool to fix the edges. It can also clean and separate the backdrop. Navigate to the Layers tool and right-click on the layer to choose the “Refine Mask” option from the drop-down list.
Step:04—Tone and Color Correction
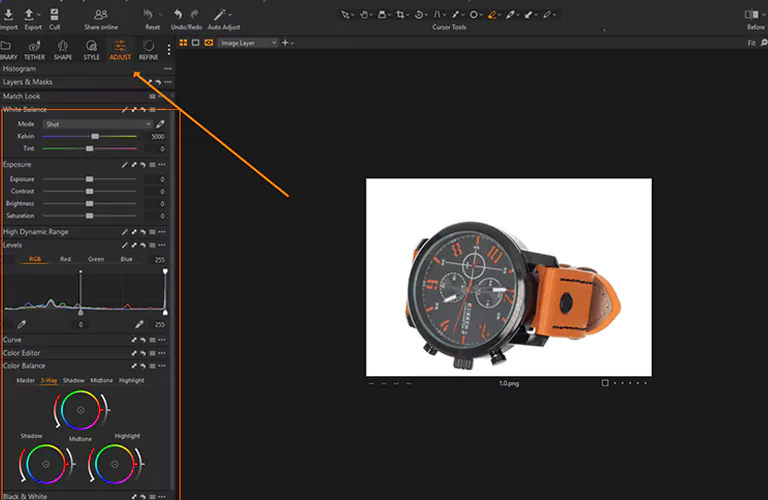
Navigate to the Exposure Tab from the top menu bar area. Select the Exposure Tab. This tool will adjust the exposure, contrast, brightness, and overall color appearance. Move the slider left or right, depending on how much change you want.
Step:05—Enhance Shadows and Highlights
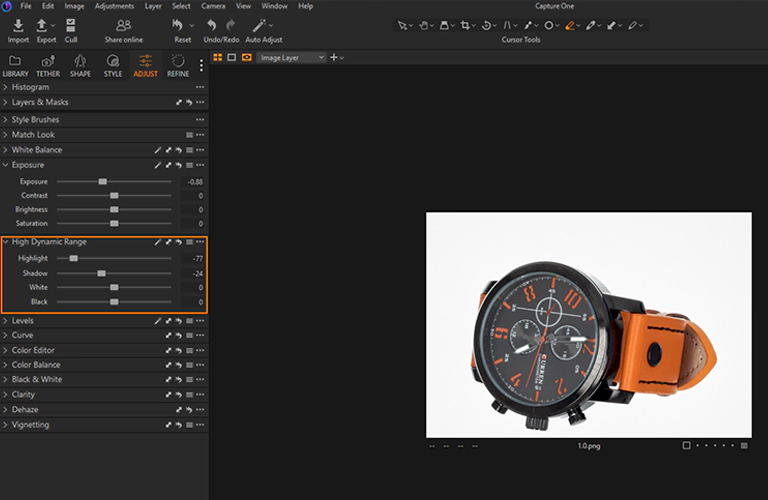
Did you notice any loss of detail and colors in your product images? If so, go to the High Dynamic Range panel below the Exposure area. Fine-tune the shadow and highlight options to improve the overall image quality. It will appropriately adjust the brightness and darkness level in particular areas, creating intense and dramatic effects.
Step:06—Edit Multiple Images Simultaneously
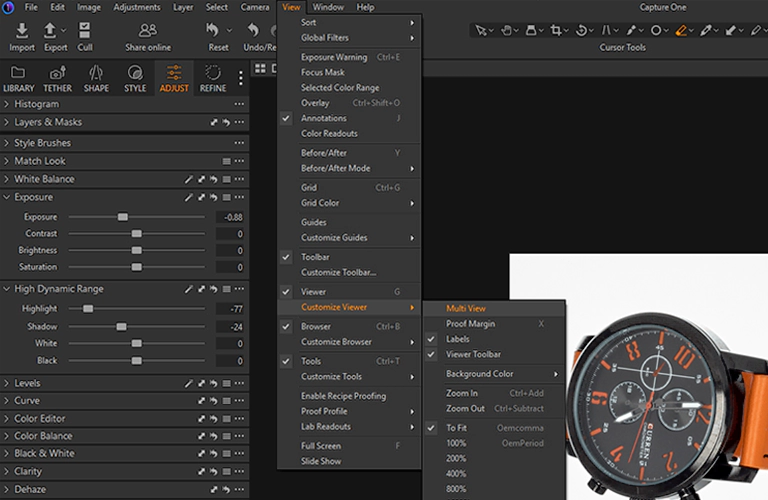
Navigate to the top menu bar area and select View > Customize Viewer> Multi-View Mode. Also, choose Image > Edit All Selected Variants from the same menu bar. The icon will turn orange color. Once you enable these two options, the system can display up to 12 images simultaneously.
Go to the top menu bar again and switch to Browser Mode. It lets you find and select photos while all images are displayed in a grid-like a photo album. Add your preferred pictures to the list and edit them using different keyboard shortcuts.
FAQs of 360 product photography
Why use Capture One for 360 product photography?
Capture One is a functional tethering software compatible with various camera brands. It can do better raw demosaicing and transfer images rapidly.
Which type of lighting do professional photographers use for 360 product photography?
Most professional photographers recommend using strobe and continuous lights for 360-degree images for softer, more even illumination.
Which image file format is the best choice for 360 product photography?
JPEG, PNG, and TIFF file formats are the top ones for retaining the best quality.
How do you select and edit several images in Capture One for 360 product photographs?
Use the Multi View and Browser Mode to select and edit several photos at a time in Capture One.
How can workflow for 360 product photography be streamlined in Capture One?
Create a custom workspace with predefined tools like crop, exposure adjustments, and tethering settings to speed up your process.
Conclusion
Capture One is the perfect software to assist you in 360 product photography and speed up your task. However, knowing the right way to use this application is key. We have outlined how to utilize this powerful tool in your pre- and post-production processes. Prepare the studio and item appropriately, and use the latest version of Capture One for a seamless workflow.


