Have you ever wondered why you edit fashion photography? In fashion photography, editing the images of clothing products is as important as editing the item itself. Even after taking photos of your fashion items, you still have to spend enough time to make them pixel-perfect and align them with your brand goal. After all, you must make the visuals compelling enough so that customers can’t help but notice them.
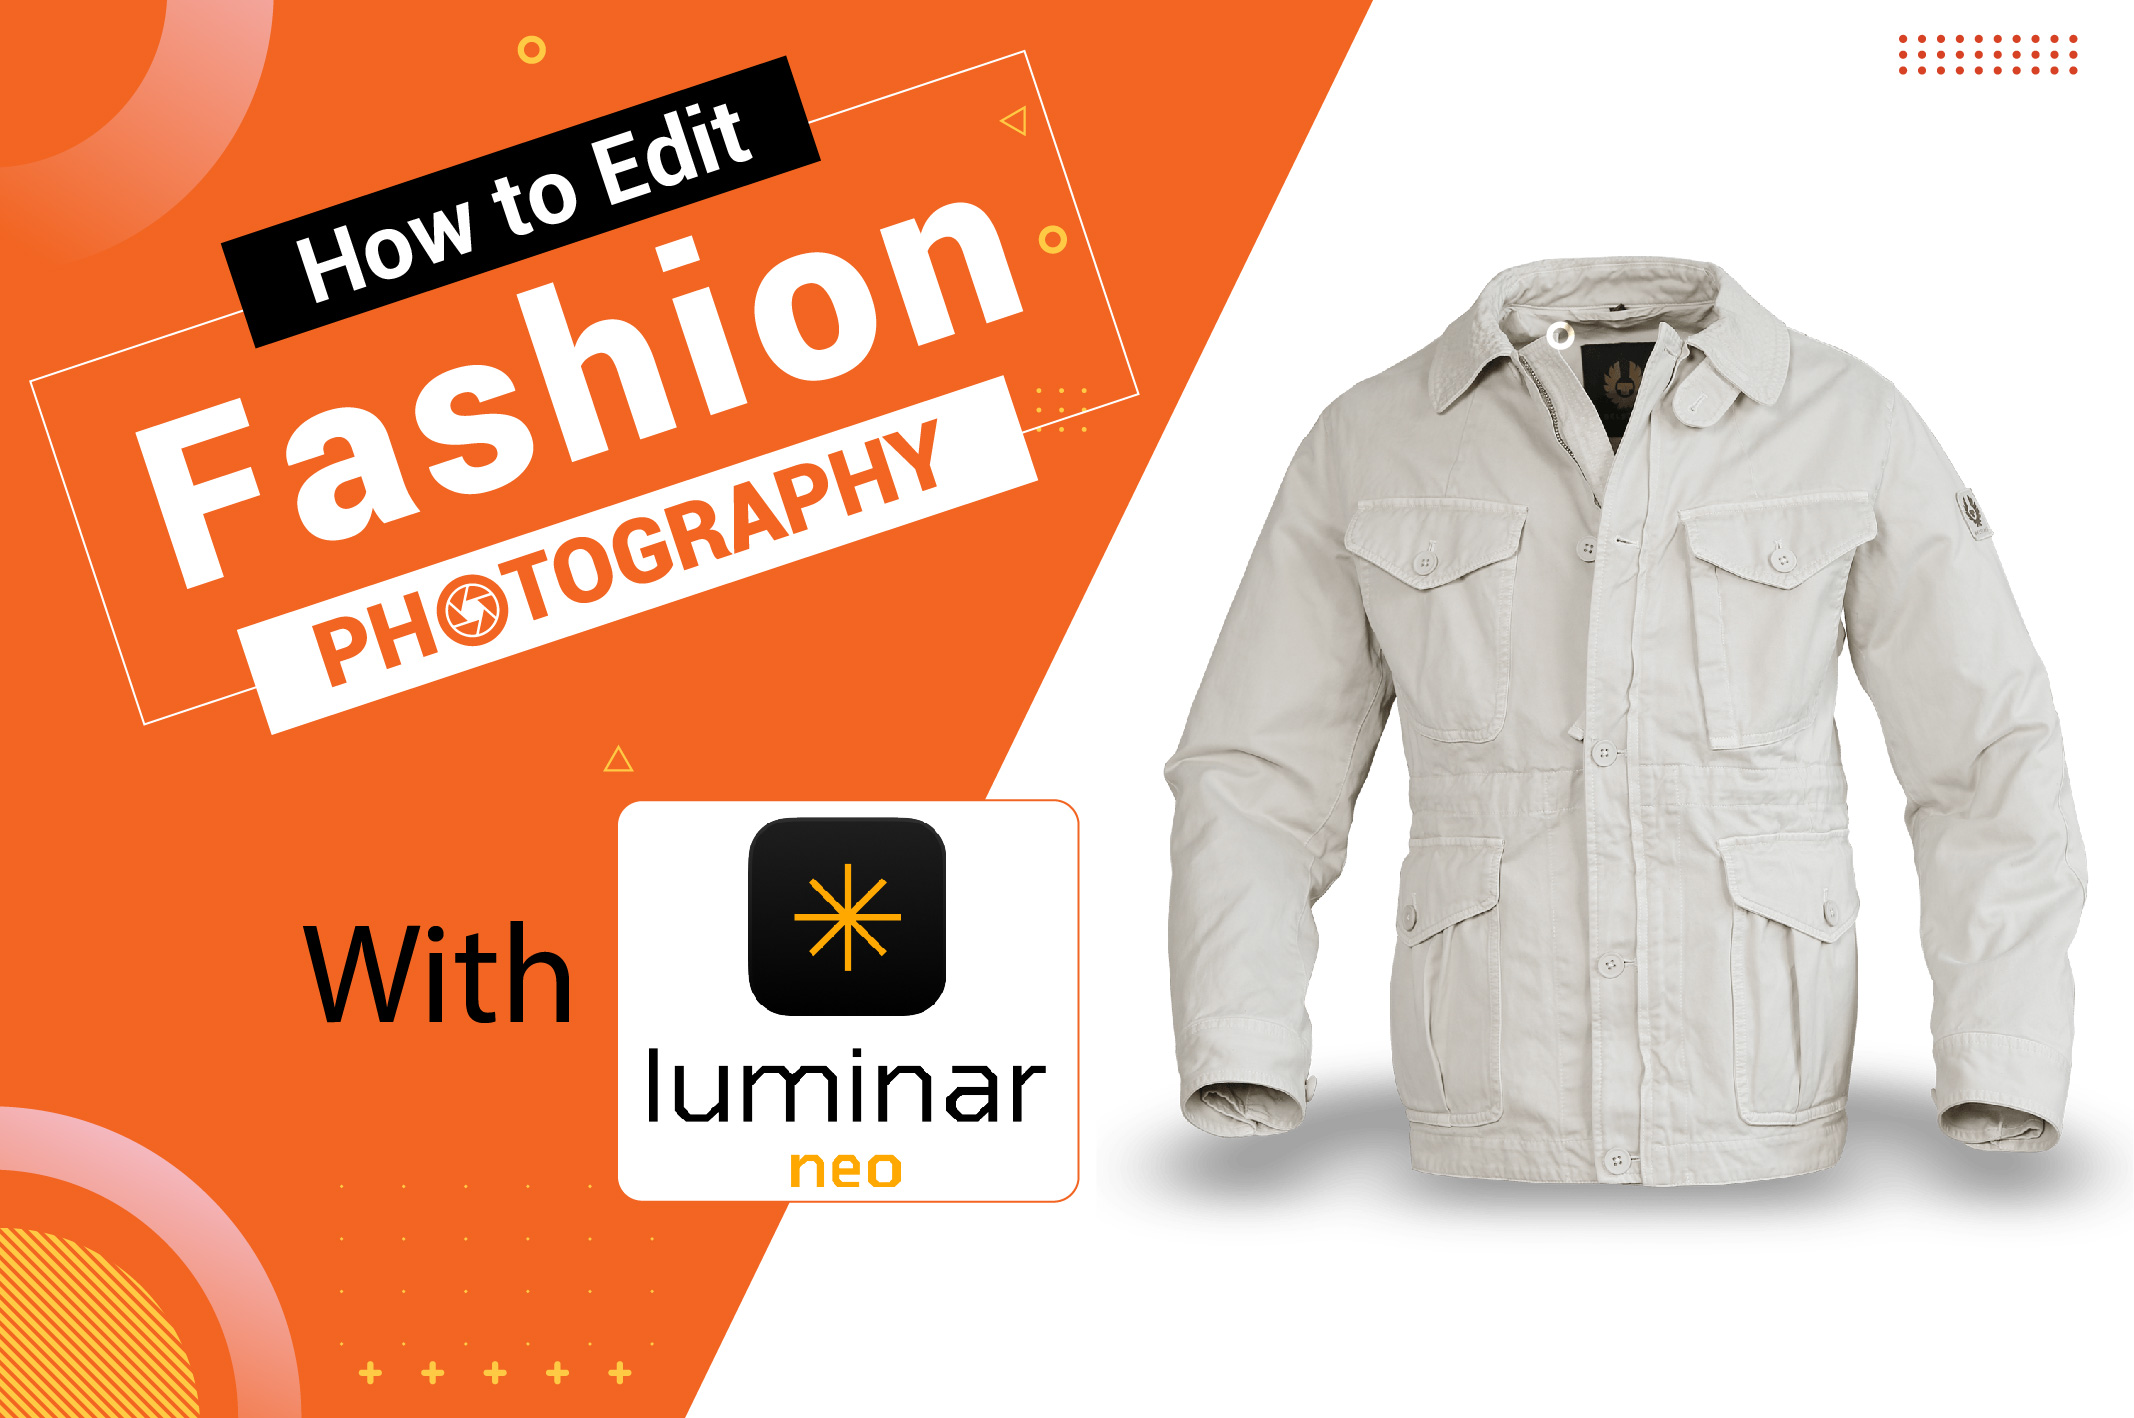
Professional editing tools and techniques can make a massive difference in the outcome. Luminar Neo is one of the most popular photo editing software for improving and enhancing digital images. This article covers how to edit product photos using Luminar Neo to improve and enhance your digital images.
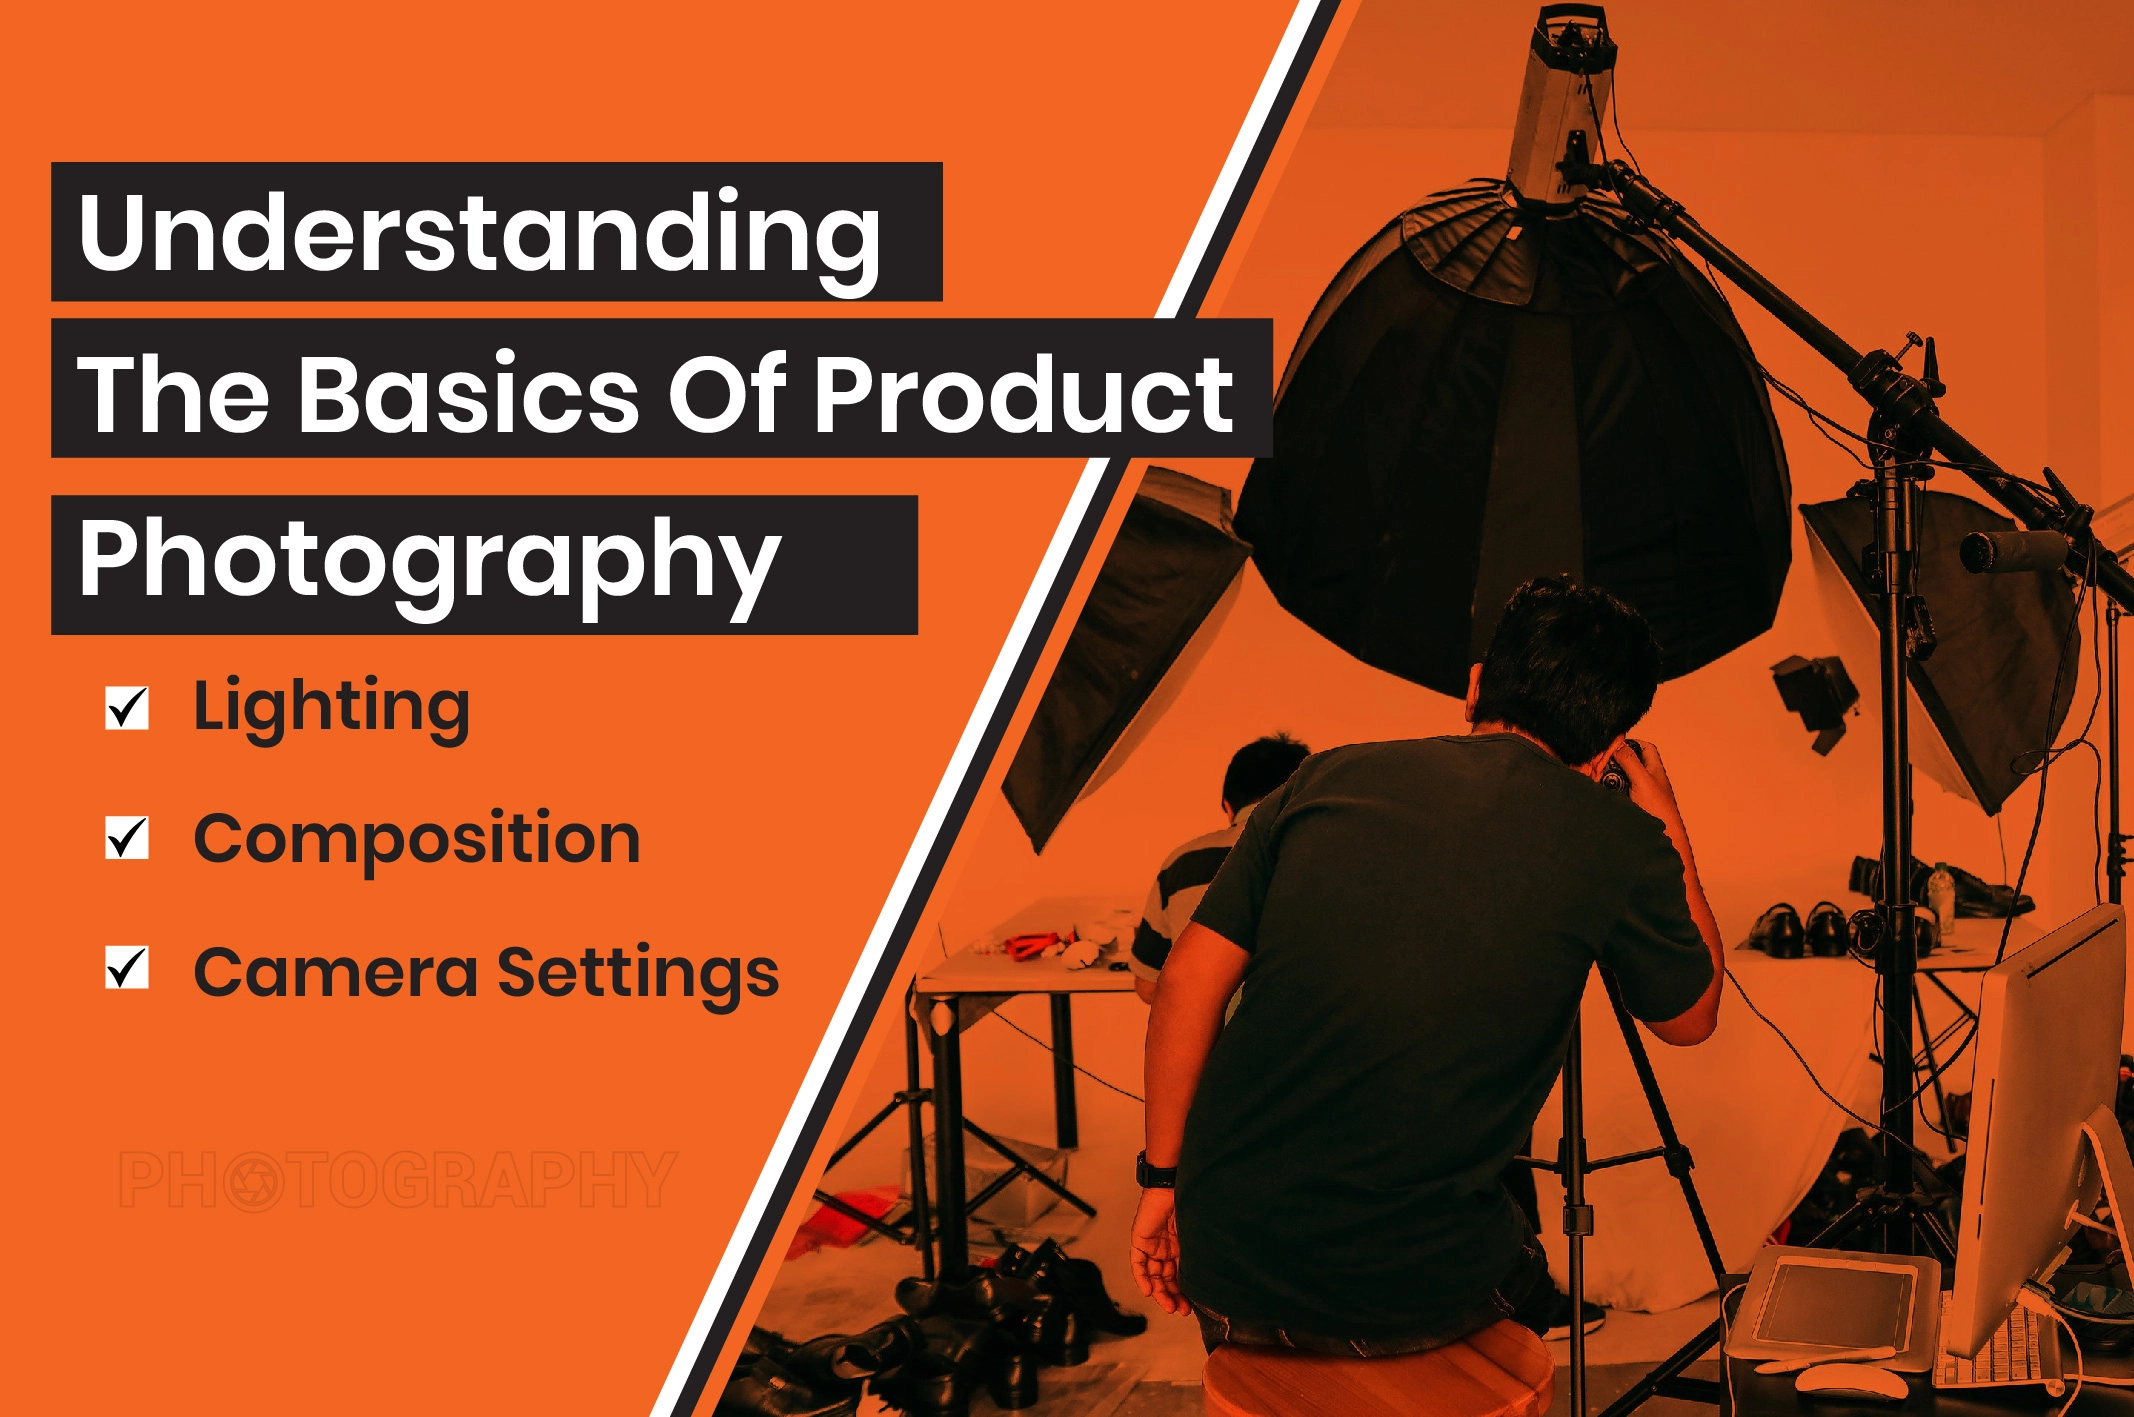
Understanding the Basics of Product Photography
Before initiating to edit fashion photography, you must ensure the product photos are as good as possible. Just like a builder chooses the strongest bricks to make a safe and beautiful house, you must edit the item images carefully to make the item look clean and professional.
Lighting
Lighting is key in affecting the mood, tone, and overall visual impact of clothing photographs. You have to use a wide range of options, such as backlit, front-lit, hard, and soft lights.
In addition, the overall exposure must be on point without blowing out or blocking up any highlights. You won’t have to worry about any noise or grain in images, especially in low-light situations.
Composition
A fashion photographer can use interesting techniques to make a creative setup and achieve powerful visuals. You don’t just focus on the main item. Relevant props and a compelling background can make your clothing photos unique and showcase the story you want to tell.
Camera Settings
Keep the noise level as low as possible to capture crisp, clear shots. Use the correct aperture settings for clothing photography to get brighter images. The ideal range is between f/8 and f/11 for an aperture. Nevertheless, it can be more or less, depending on how much depth of field you want to achieve.
You may also like to read… Ultimate Guide for Best E-commerce Product Photography
Things You Need to Do Before Editing Fashion Photography
Before starting the fashion item images, you must note the key points in your list.
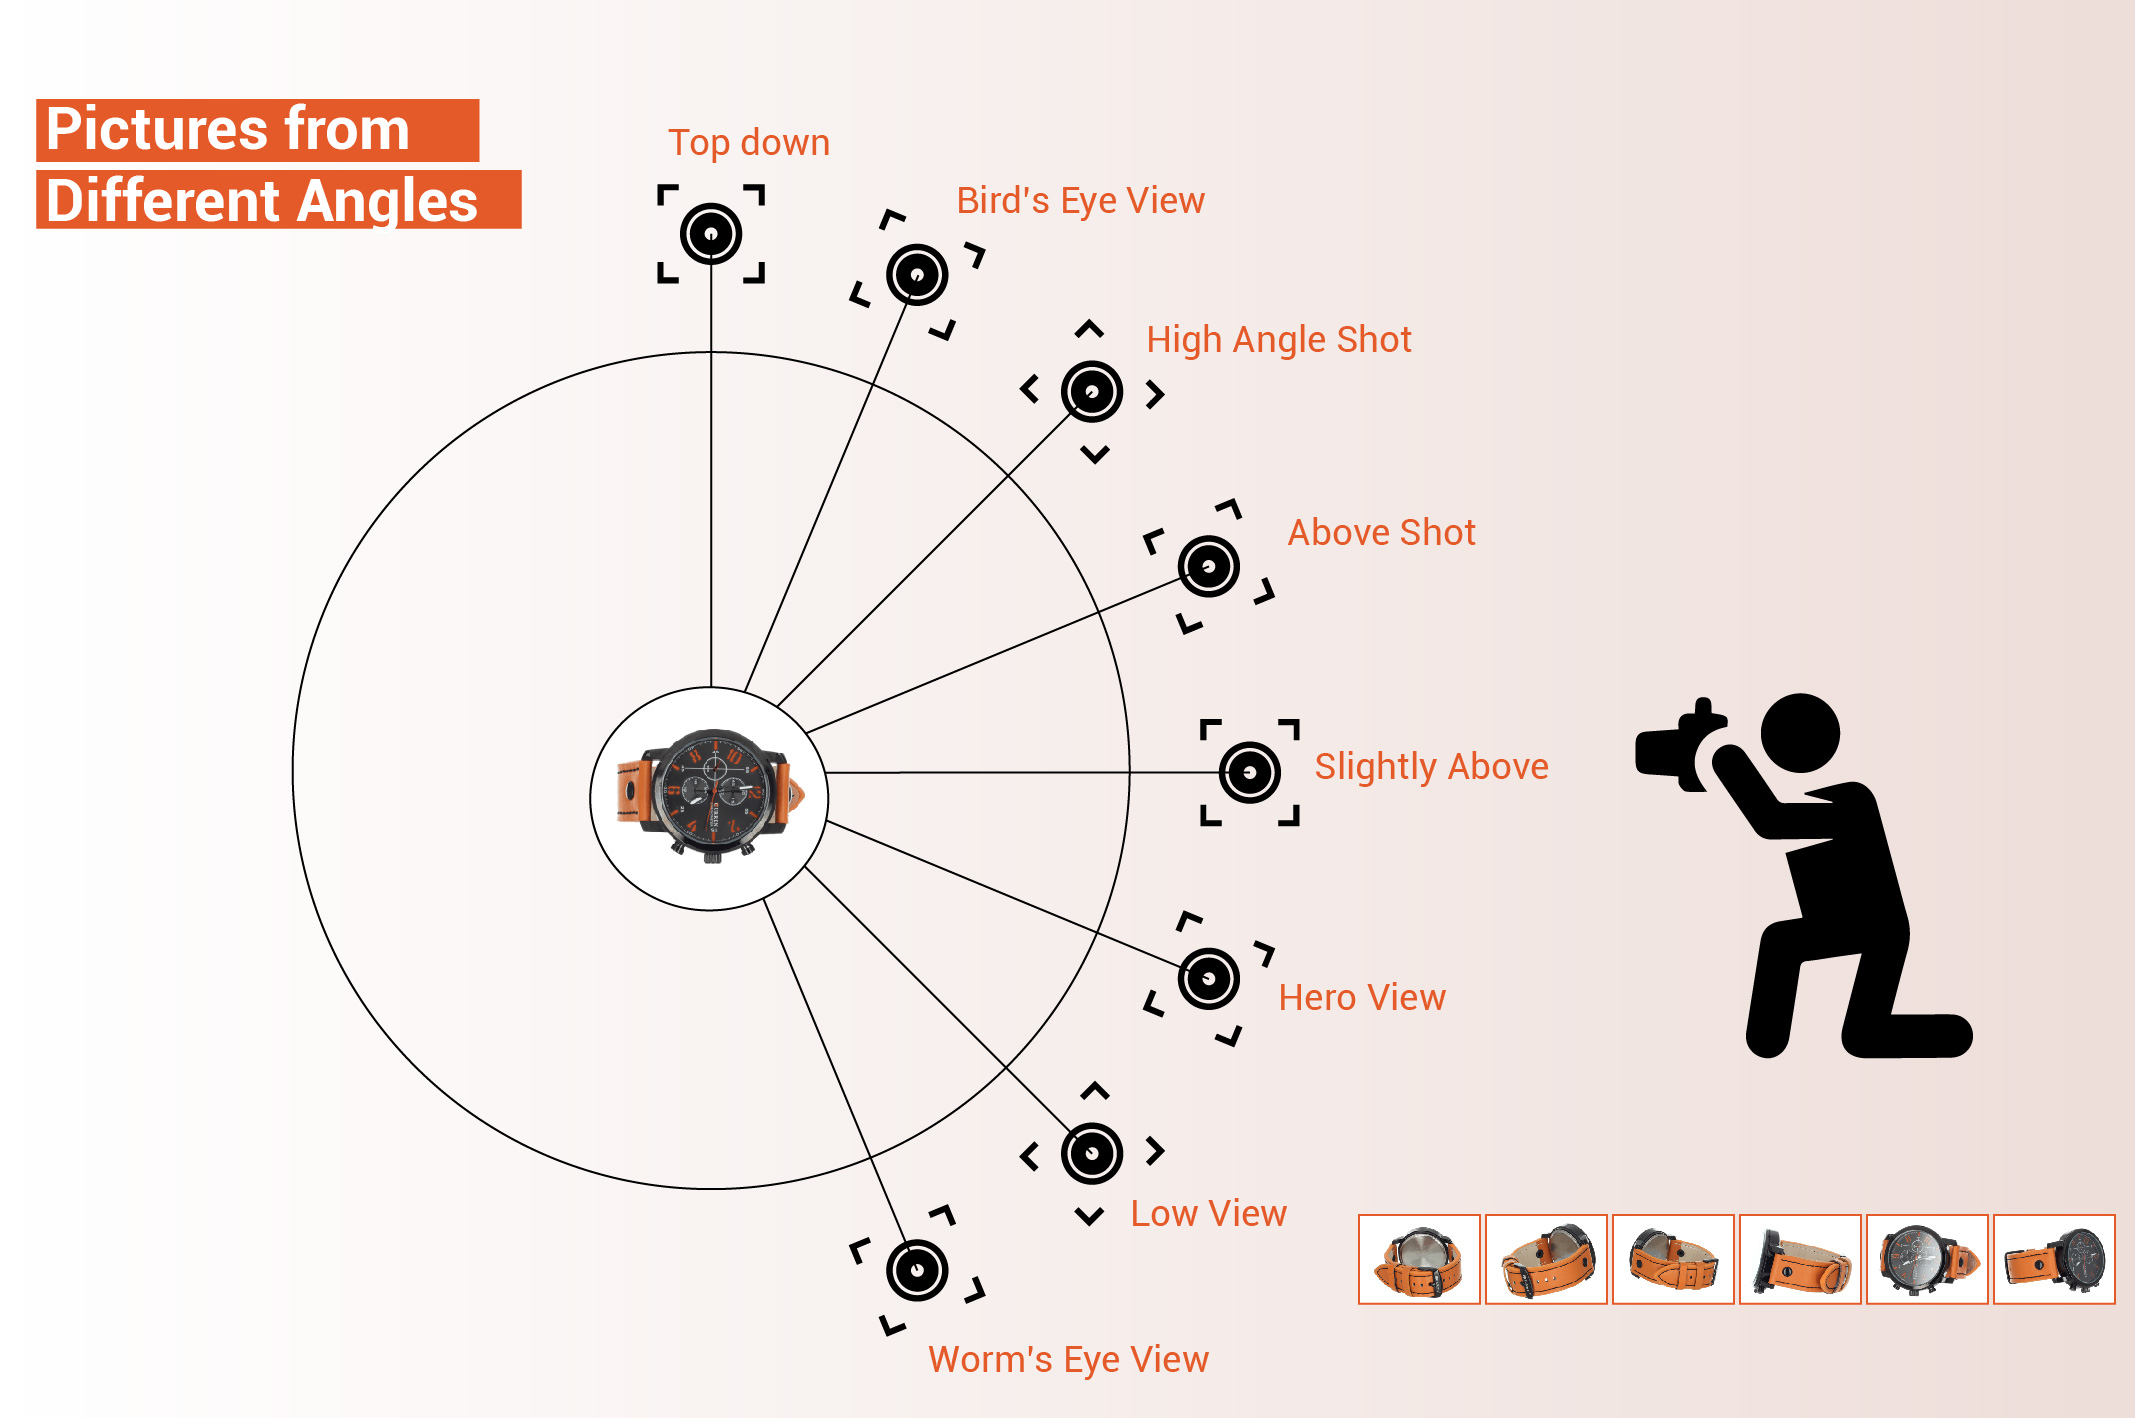
Pictures from Different Angles
Capture clothing products from different angles, including front, back, and sides. Multi-angle shots easily highlight special features, textures, or designs of the apparel. It provides customers with a comprehensive view. They can visualize how the item will look in real life.
Same Item with Different Lighting
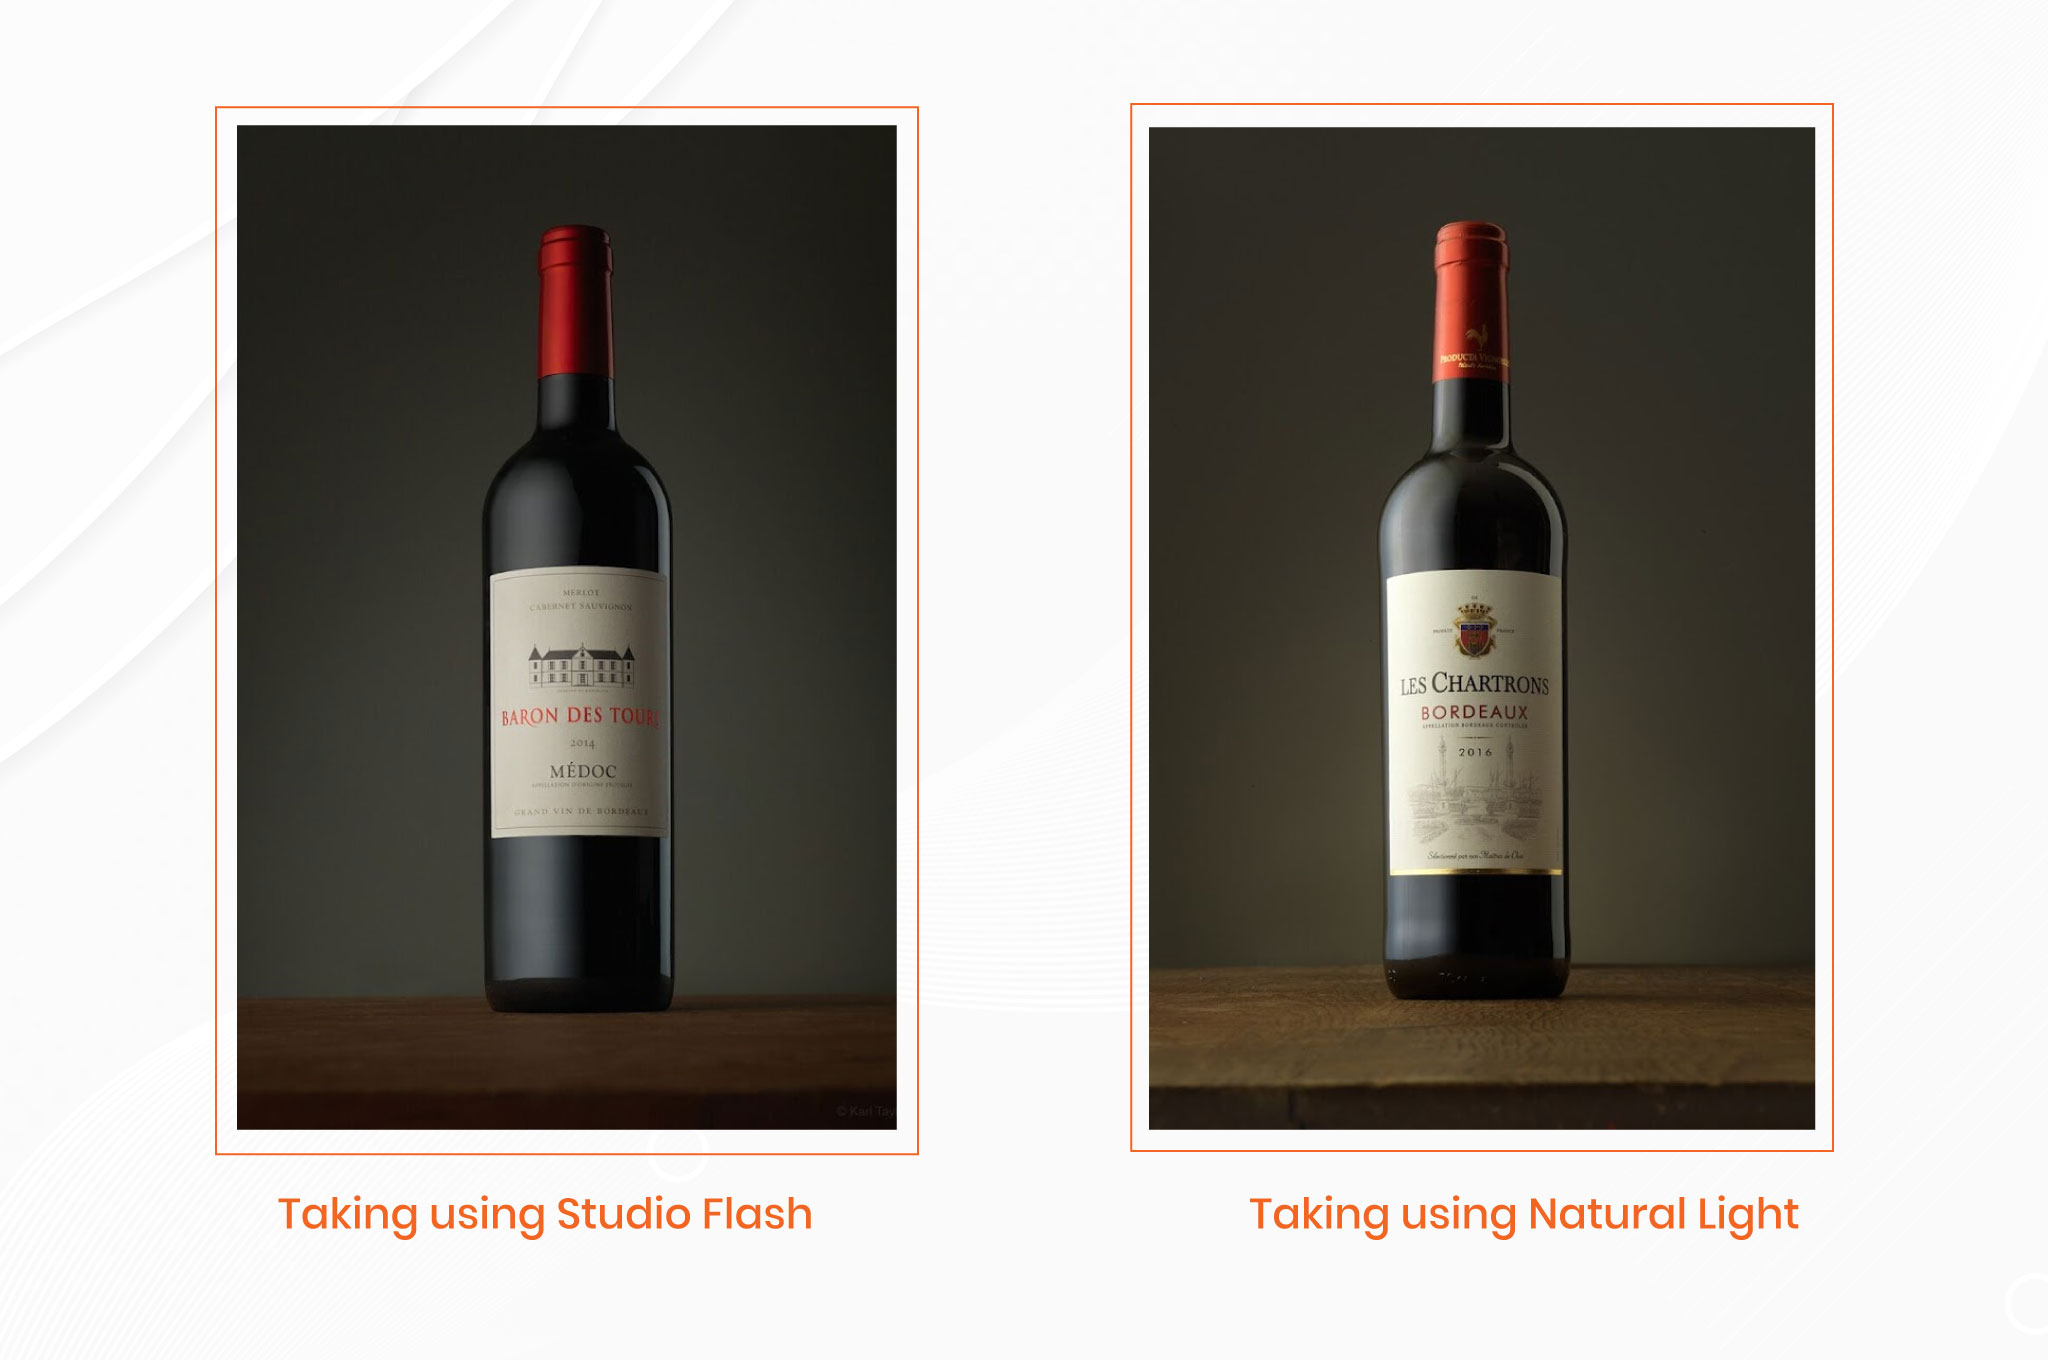
Fashion goods may look slightly or moderately different in natural and studio lights. Artificial lighting is the best choice if you prefer better control over lighting. You can decide the direction, intensity, and quality of the lighting.
In contrast, natural light sources are good for creating a gloomy, solemn look. However, you have to be a little careful. It may hide important details and make the color dull. The most important thing is determining whether your customers want to see the garment images with natural or studio lights.
Use the Updated Software
What does a sculptor use to refine marble? Fine chisels, right? The same goes for a professional photo editor. S/He uses the right software to polish the clothing image perfectly. Regardless of your image editing software, the latest version is always preferred to enjoy the new features.
Check Your Monitor
Do your product photos look exactly the same on the digital monitor as in real life? Calibrate your monitor perfectly for accurate color representation. You can use a gray card or ColorChecker to reproduce the correct color. EIZO-developed ColorNavigator software also comes in handy for better monitor calibration.
You may also like to read… Common Product Photography Mistakes That Kill Your Sales
Why Use Luminar Neo to Edit Fashion Photography?
This image editing software has many innovative features that stand out from other typical photo manipulation applications. Let’s learn how it stands out from others.
AI-powered Tools
Luminar Neo is equipped with various AI-powered tools to automate tedious tasks and speed up your post-production process. The following are a few of them.
- Accent AI: Adjust hue, saturation, highlights, and contrast with one slider
- Color Harmony: Create harmonious and balanced color palettes
- Mood AI: Apply pre-defined color grades with different styles and effects
- Sky AI: Enhance or replace skies
- Atmosphere AI: Add and enhance fog, mist, or haze
User-friendly Interface
Are you a beginner or an advanced product photographer? Luminar Neo is beneficial for both due to its easy-to-understand interface. The clear, intuitive interface lets you hover over various functions within a very short time.
Affordable
Luminar Neo comes at an affordable price. Its annual Subscription fee is only $49. However, it is also available for the Lifetime Perpetual License, which will cost only $79. You will save a lot of money, especially in the long run.
Built-in Presets
This professional image editing software is equipped with various built-in presets. Its content-aware technology will recommend the best presets after deeply analyzing your photo. Their 450+ meticulously crafted presets will cost only $49.
How to Edit Fashion Photography with Luminar Neo?
Beginners and advanced photographers can easily use Luminar Neo to edit product photographs. Below are the steps to follow to edit fashion photography using Luminar Neo.
Step:01— Clean Dust and Debris
Dirt, dust, or even tiny pieces of hair or skin cells are inevitable during fashion photoshoots. These airborne particles will sit on the main item, props, or the background. Press “Ctrl +” for Windows and “Cmd +” for Mac on your keyboard to zoom in on the image. Look for all areas carefully if they contain any dust or debris.
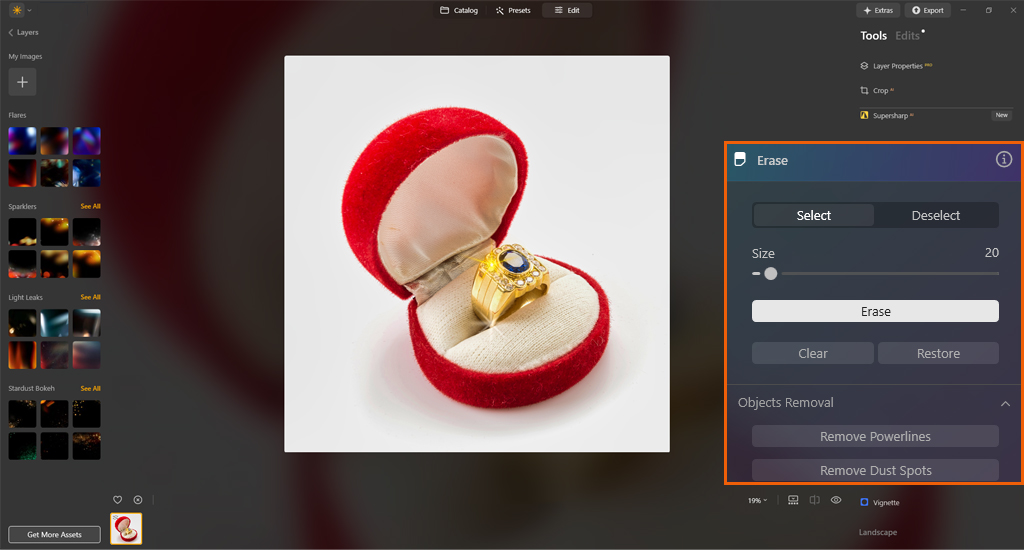
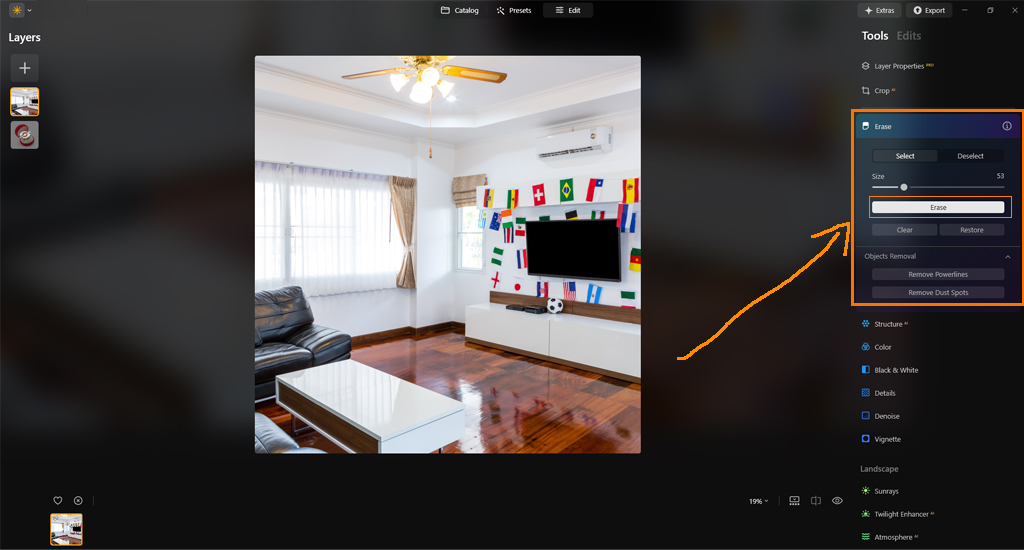
Navigate to the Edit tab area. Select the “Essentials” from the panel. Choose the “Erase Tool” option and then select the “Remove Dust Spots” option. Brush over the parts you want to clean. Select the “Erase” option to remove the selection area.
Step:02— Erase Imperfections
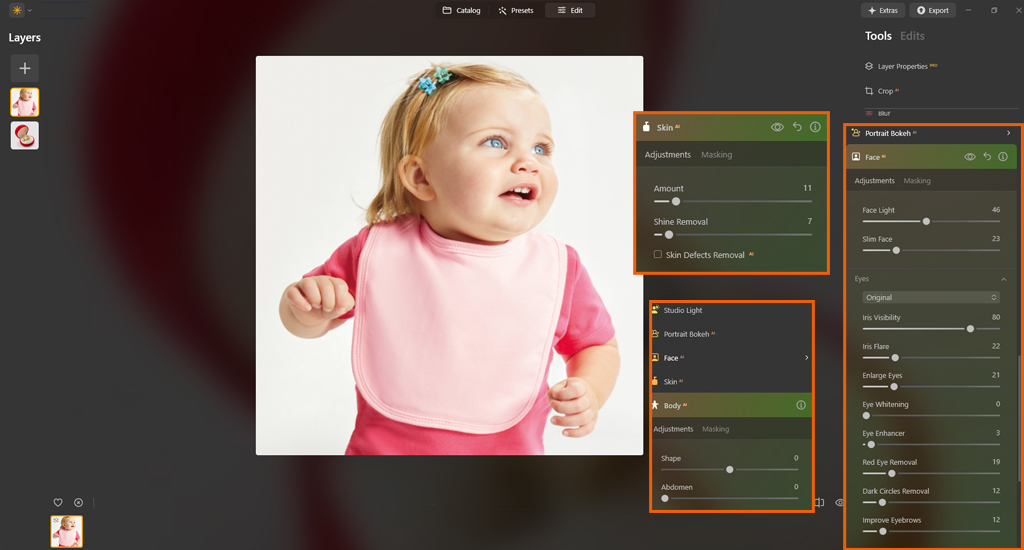
Are you using any professional model to photoshoot the product? S/He may have acne, freckles, moles, or scars on their skin. You can use the skin and face tools to remove such skin creases. Select Edits > Portrait > Skin and Face Tools.
Does the clothing item have any scratches or dents even after being extremely careful? Don’t think it happens only to you. Some imperfections are inevitable. You can use the same tool for this purpose.
Step:03— Clean Larger Unwanted Elements
Does your clothing photo have any bigger flaws that make it look awkward? The best solution is to use the GenErase tool. It can remove such noticeable distractions with a few clicks. It has a generative built-in AI technology to automatically detect and erase flaws while blending seamlessly with the surrounding area.
Tap on the apparel photo in the Catalog view mode. Navigate to the right side of your screen and press the GenErase button. For instance, this tool can remove the brand logo or tag from a clothing item.
Step:04— Remove the Background
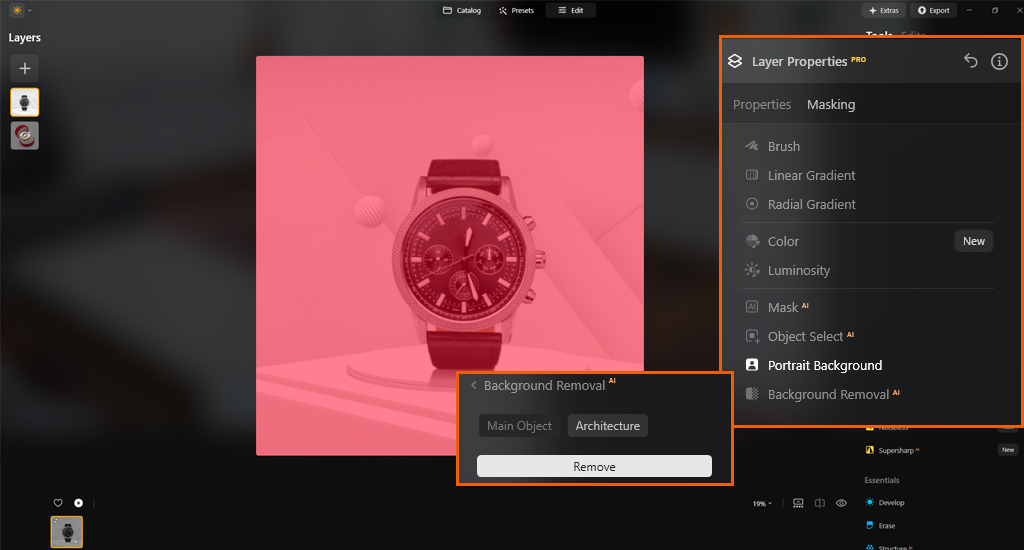
Separating a product image from the background is a bit time-consuming. It can be enormously complex if the edges are not transparent. Luminar Neo is equipped with the Background Removal Tool. This powerful tool can even detect complicated edges and clearly distinguish between the subject and background.
Navigate to the Edit Module and tap on the Layer Properties. Select the Masking tab, followed by the “Portrait Background” from the drop-down list. Let the system analyze the photo. Once it is done, tap on the “Remove” icon.
Step:05— Adjust the Brightness Level
Make sure your fashion item’s images are adequately illuminated. They must have enough lighting for clarity and visibility. Do e-commerce photos have a balanced exposure? It is necessary to showcase their details and textures.
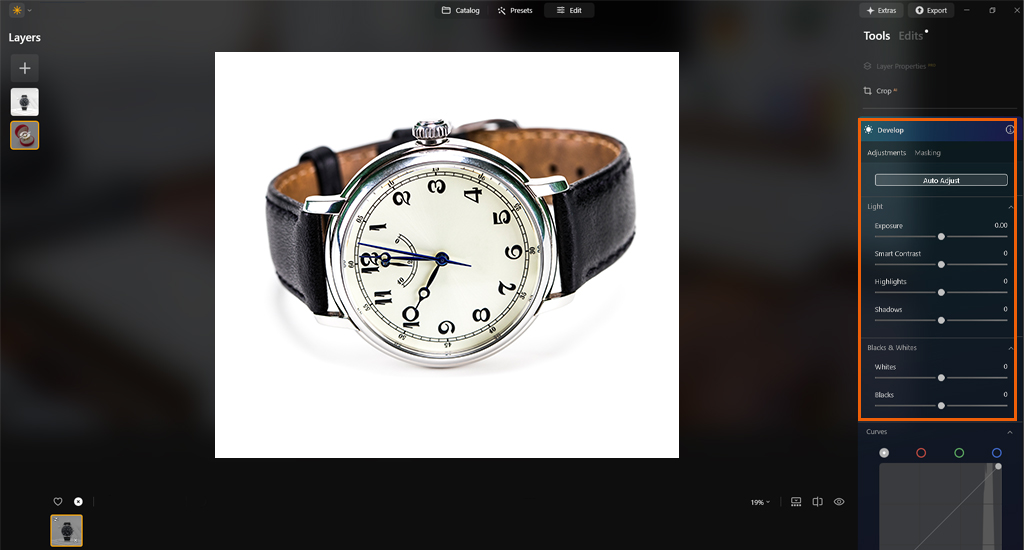
Navigate to the Edit module from the toolbar area and tap on the Histogram. Can’t you still see the option? Right-click on the photo and select the “Show Histogram” button. Adjust the exposure and brightness level depending on how you want the final look.
Step:06— Modify the Contrast
Proper contrast adds depth and creates a realistic look in photos. It is the difference between the light and dark in images. One key point is making a balanced contrast between the clothing item and its background.
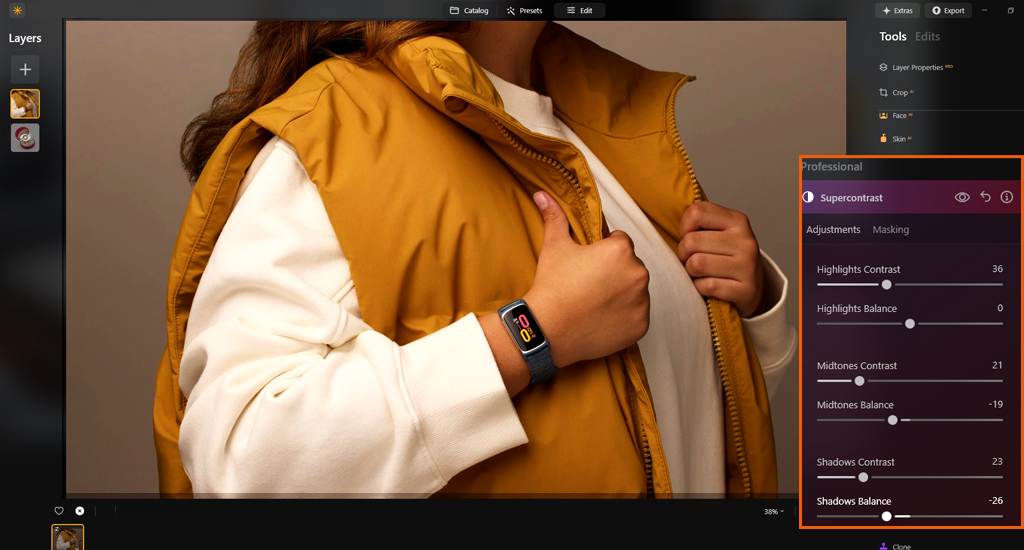
Luminar Neo has a special Supercontrast tool. This special function has six distinct controls to adjust the highlights, midtones, and shadows. Navigate to the toolbar and tap on the Professional section. Then, click on the Supercontrast tool. Relocate the slider to the right or left to adjust it from 0 to 100, depending on how you want the final look.
Step:07— Refine the Color
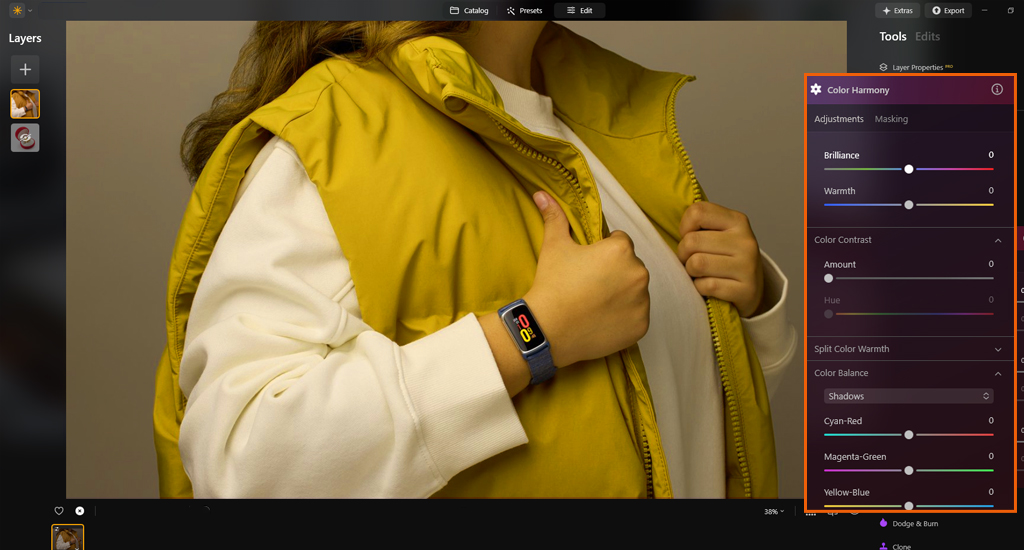
Correcting the color ensures accurate product representation and makes customers satisfied. Luminar Neo contains various color correction tools. If you want comprehensive control over color, the Color Harmony tool is one of the best choices. You will find it in the Professional section of the editing tools.
For better application of different color tones in highlights and shadows, the Toning tool is perfect. Go to the Edit module area. Tap on the Creative section and select the function below the Toning heading.
If you want to adjust the overall color intensity in an image, use the standard Color tool. You will find it in the Essentials section of the main toolbar.
Step:08—Enhance Textures
An undesirable or poor product texture can create a negative impression on customers’ minds. They don’t feel pleasant and tactile while seeing the item. After all, it lacks fine details. You can add details by improving the textures in the garment’s images.
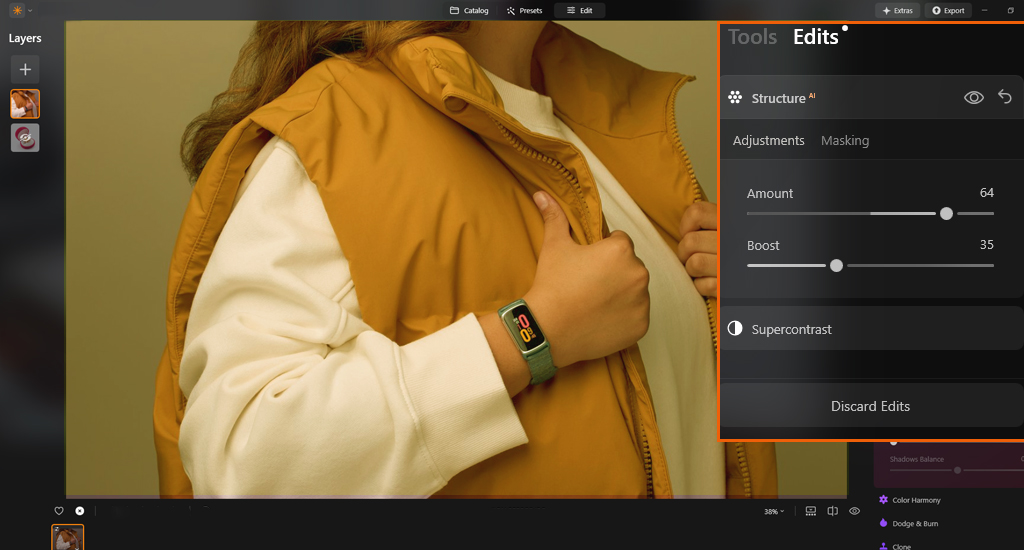
Use the Structure Tool to enhance the clarity and detail of a photo. You won’t have to worry about showing any artificial sharpness. The result will be natural. Navigate to the Edit module and tap on the Structure AI tool. Move the slider left or right to adjust it from 0 to 100 based on your desired result.
Step:09— Lighten or Darken Specific Areas
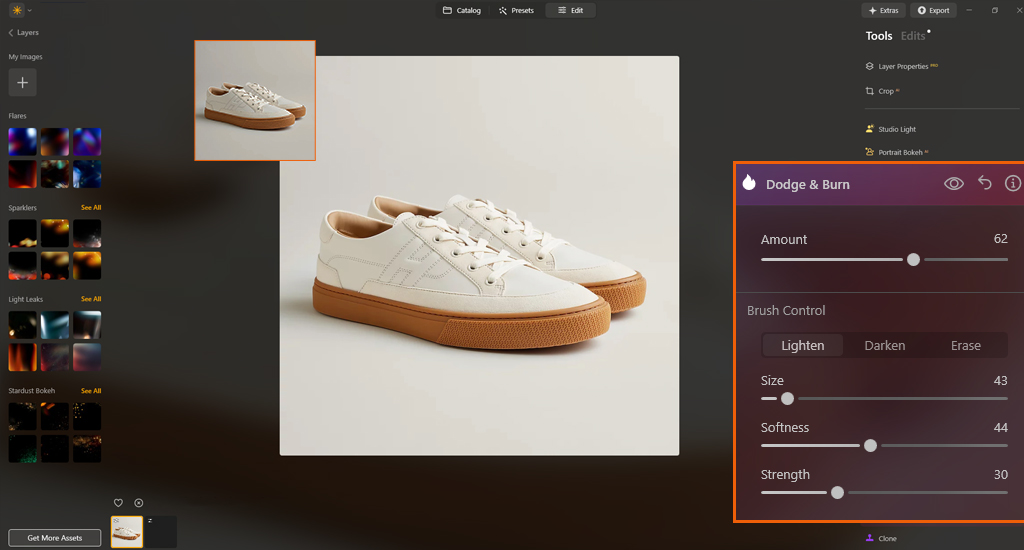
Are there still any too-bright or dark areas in your clothing product images? Navigate to the lower section of the main toolbar and stop at the editing area. Tap on the professional section and select the Dodge and Burn tool.
Increase or decrease the brush size and its intensity based on your requirements. Now, brush over the area to lighten specific areas (dodge) or darken particular areas (burn).
Step:10— Add a Subtle Shadow
So, you have already gone a long way to retouch your clothing images, right? How about adding a subtle shadow to them? This will include depth, composition, and realism. The overall look will be appealing and professional. It can also highlight the texture and features better.
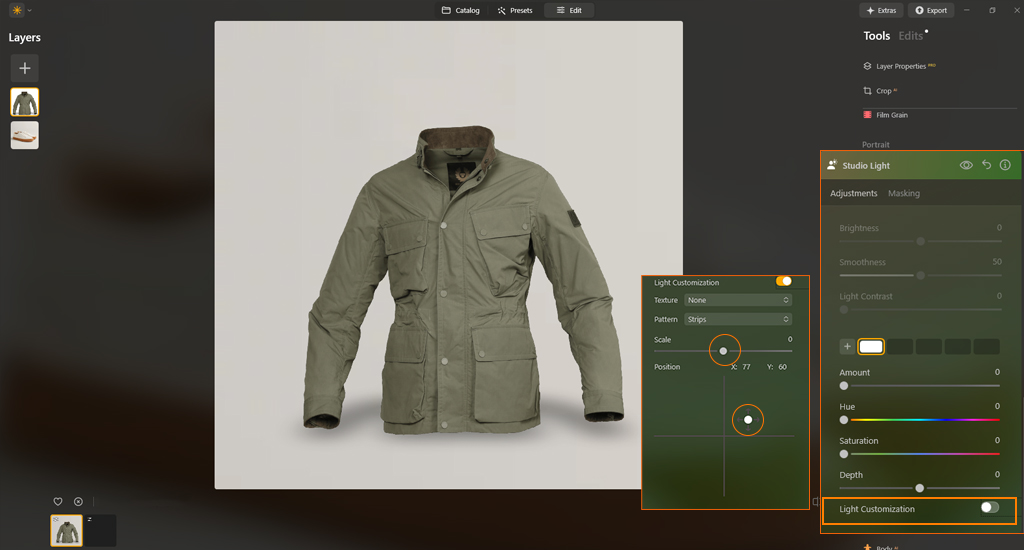
Navigate to the Editing panel and tap on the Studio Light tool. Now, enable the Light Customization button to reveal additional settings. You can add various types of shadows from this function, such as harsh shadows, soft shadows, patterned shadows, colored shadows, directional cast shadows, etc.
Step:11— Batch Process the Images
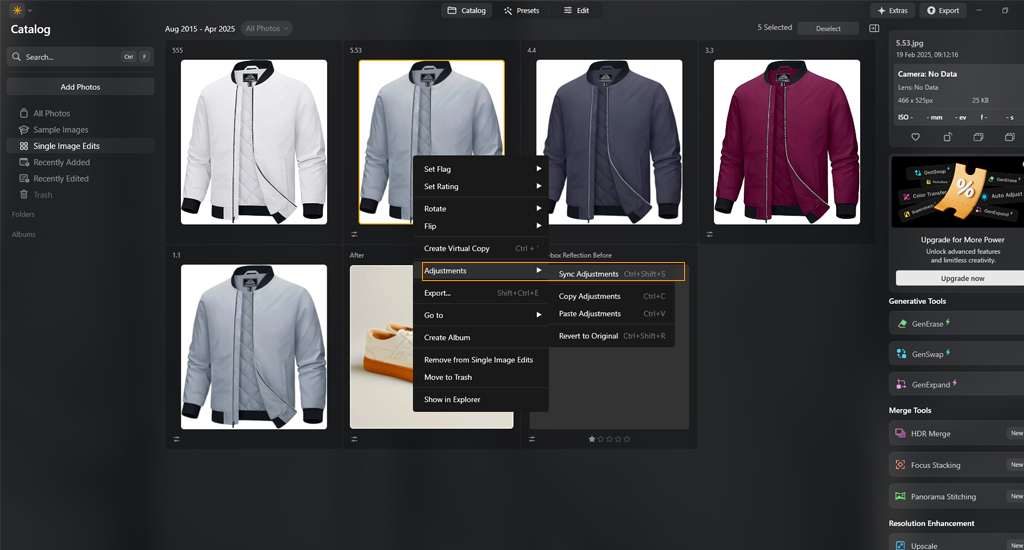
Inconsistency across clothing product images may cause unprofessional and low-quality visuals. You can use the batch editing option to simultaneously apply the same settings for multiple photos. It saves you valuable time and effort as you don’t need to edit each image individually.
Navigate to the top left corner of the screen and tap on the File menu. Now, choose the Batch Processing option from the drop-down list. Select all the images you want to batch process. Apply the same edits to all the selected photos.
FAQs
-
What is the right way to add a creative mood or style to fashion images?
Both LUTs and filters of Luminar Neo are great for transforming the visual into different styles and creating a vintage vibe or cinematic look.
-
How do you sharpen details in a garment image quickly?
The Structure Tool in Luminar Neo is perfect for improving a product photo’s clarity and detail. You won’t have to worry about over-sharpening or introducing noise.
-
What is the best method for erasing distractions from the background in Luminar Neo?
The Clone tool, located below the “Dodge & Burn” is an effective tool for quickly removing undesirable objects. The composition will be still the same as before.
-
How can you make the lighting in clothing product images more balanced?
One effective tool is the “Relight” tool in Luminar Neo, which adjusts the lighting in the foreground (main item) and background (surrounding area) separately.
-
What is the most effective approach to improving the skin tone in Luminar Neo?
The “Portrait” tool is one of the most widely used functions to improve and retouch the model’s face, skin, and body.
Conclusion
When it comes to compelling fashion images that drive sales, you must use professional-grade software to retouch the visuals in the best possible way. Luminar Neo is one of the most powerful software to edit fashion photography in a non-destructive way. We have already outlined a step-by-step guideline for using this professional application to produce polished, fashion-forward visuals.
