When you know exactly how to edit jewelry photos in Lightroom, you, as an e-commerce seller, will capture the true brilliance of your precious metals. Even after hours of editing, unwanted background, inconsistent contrast, wrong shadows, reflections, and incorrect lighting often remain.
This can be said to be a lack of proper methodology and not choosing the best photo editing software for jewelry. This blog post is going to present you with the proven steps that, after getting them, you will no longer have any worries about jewelry photo editing. Let’s get started.
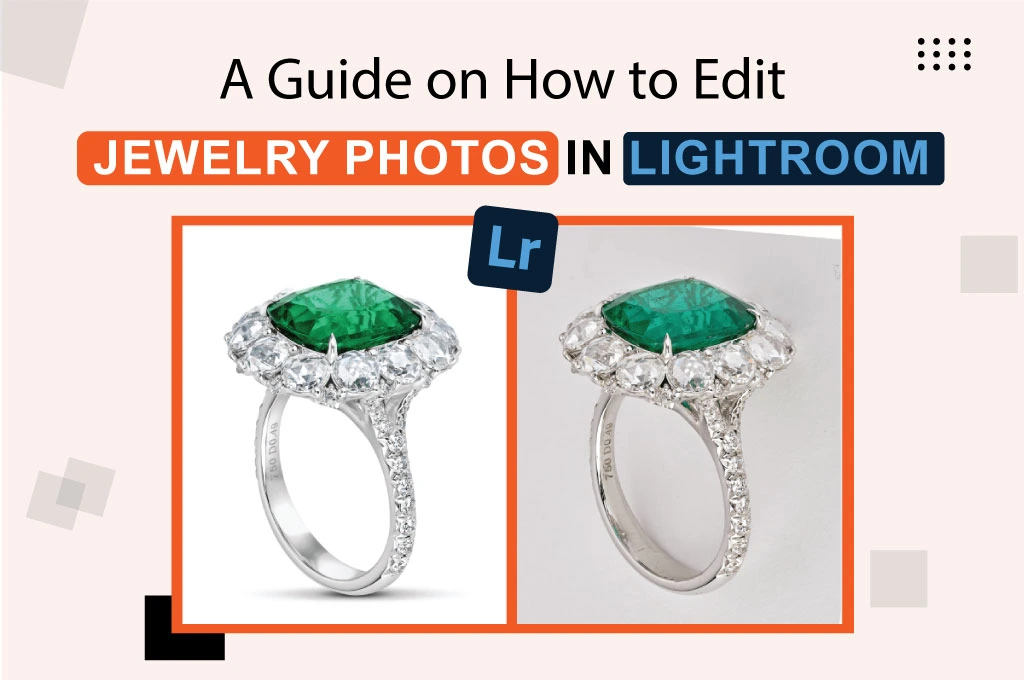
How to Edit Jewelry Photos in Lightroom Step-by-step
When it comes to enhancing the beauty of gemstone images, proper editing and retouching are a must.
Adobe Lightroom is an excellent photo editing software that gives ornamental photos a professional and attractive look.
Let’s learn step-by-step how to edit jewelry photos in Lightroom:
Step 01: Import The Image

- Navigate to the Library module located at the top of your screen. If you don’t see the Library tab, tap on it to switch to the Library module.
- Then, choose your preferred trinket photo from the folder. Don’t forget to keep a duplicate file of your original ornamental image to avoid unwanted loss.
Step 02: Crop and Adjust the Angle

- After importing the gemstone photo, it’s time to crop it. Head to the Develop Module section and click on the Transform Panel.
- Then, press the ‘Auto’ button and let the system automatically correct the distortion, including both the vertical and horizontal axes in your photo.
- If it is still not enough, use the manual Crop tool from the Develop Module section. Make sure not to cut important elements. Use the Crop Overlay tool for further precise crop adjustments.
Step 03: Work on the Exposure

- Ornamental photos must have moderate exposure to highlight details without overexposing or underexposing.
- Visit the Develop module section and click on the Light panel option. Then, select the Exposure slider icon.
- Greg it to the left to reduce the brightness level and to the right to increase the brightness level.
You may also like to read… Photoshop vs. Lightroom: Best Choice for Photo Editing
Step 04: Adjust the White Balance

- Head to the Develop module area and then move to the White Balance section from the upper right corner zone. Choose the ‘Auto’ option from the drop-down list.
- If the result is not up to the mark, work further to adjust the white balance.
- Direct to the Color Panel area at the top section and select the Temp slider option. Drag it to the left or right to adjust the color balance of the bijouterie image. It also adds warmth or coolness in photos, ranging from gold to blue.
- Next, tap on the Tint slider to correct “off-axis” color balance issues. You can select the range from magenta to green.
Step 05: Adjust Shadows and Highlights

- When it comes to creating compelling precious stone images, rich shadows and bright highlights can add depth to photos.
- You have options to select from pure black to bright white. Choosing the right range is the key.
- Navigate to the Light panel and select the Highlights and Shadows slider.
- Move the slider right to brighten the shadow and make fine details in dark areas visible. Or move the slider left to darken the shadow and add contrast and depth to the photo.
Step 06: Refine Details and Sharpness

- Head to the upper-right corner of your toolbar section and click on the Edit icon. Then, select the Effects panel from the drop-down list.
- Finally, tap on the Clarity Slider and move the slider right or left to decrease clarity and create a softening effect or increase clarity and sharpness.
- If you want further refinement, use the Sharpening tool to add contrast to edges and create an illusion of detail.
You may also like to read… A Simple Tutorial on How to Extend a Background in Photoshop CC
Step 07: Eliminate Blemishes and Distractions

- Do your ornamental images have any blemishes or distracting elements in their background?
- Navigate to the Develop module below the Histogram tab and choose the Spot Removal tool. After turning on the tool, use it on a particular area and correct imperfections, such as small dust, specks, etc.
- If you want further retouching, use the Clone Stamp tool to remove distracting objects and create a consistent look throughout the trinket image.
- Make sure to save and export the photo once you are done editing it.

Frequently Asked Questions for Jewelry Photo Edit in Lightroom
1. How do I fix distorted angles and perspective in jewelry photos?
In the Develop Module, navigate to the Transform Panel and click the ‘Auto’ button. This allows Lightroom to automatically correct both vertical and horizontal distortions. For further precision, you can use the manual Crop tool and the Crop Overlay tool to refine the composition without cutting out important elements.
2. What is the best photo editing software for jewelry to achieve professional results?
Adobe Lightroom is an excellent choice for ornamental photos, as it provides a professional suite for color correction, exposure adjustments, and blemish removal. For high-volume editing, it allows you to maintain consistency across a gemstone collection while ensuring the original attributes of the items remain intact.
3. How to edit jewelry photos in Lightroom to make gemstones look clear?
To highlight intricate details, you must manage Exposure and Clarity. Use the Light panel to find the right brightness balance, then navigate to the Effects panel to adjust the Clarity Slider. Increasing clarity adds sharpness and edge contrast, making the facets of the precious stones pop.
4. How can I remove dust and reflections from my jewelry images?
You can eliminate blemishes by using the Spot Removal tool located below the Histogram tab in the Develop module. For more complex distractions in the background or on the metal surface, the Clone Stamp tool can be used to create a consistent and clean look throughout the image.
5. How do I correct the color of gold or silver that looks “off” in a photo?
Color issues are fixed in the White Balance section of the Develop module. You can start with the ‘Auto’ setting or manually use the Temp slider to shift between blue (cool) and gold (warm). Additionally, the Tint slider helps correct “off-axis” color issues, such as unwanted magenta or green hues.
Conclusion
By learning how to edit jewelry photos in Lightroom, you will effectively turn dull images into high-converting ones. Make sure the resolution is high, so you can edit better.
With this, every process from white balance correction to precision sharpening will work to make your jewelry look more sophisticated. It will be blemish-free, but the photo will not be so polished that the authenticity and natural look of the gemstone are lost.
Keep these in mind and go ahead. Good luck in getting an incredibly impressive metal photo!